
How to Paint Living Room Walls Like a Professional for 2027
Careful preparation, clean edges, and steady rolling matter more than speed or expensive tools. That is how to paint living room walls the professional way: plan the room, cut in first, roll in daylight, and let each coat dry before the next.
With a free weekend, a clear plan, and the right basic tools, most beginners can get a professional looking result on their first living room. The room is big enough that mistakes show, and forgiving enough that a careful beginner can fix them as they go. That is the promise of learning to paint living room walls properly, and this page keeps it.
This guide is different from a general room painting guide because it focuses on living room problems only. Living rooms have large wall areas, big windows, televisions, bookcases, fireplaces, and furniture that cannot easily leave the room. You will learn to paint living room walls around all of that without rushing the finish.
What makes a living room paint job look professional?
A professional finish is smooth, even in color, and sharp at every edge. You should not see roller marks, drips, patchy spots, or wavy lines where the wall meets the ceiling or the trim. The color should look the same in daylight and in lamplight, with no thin areas showing the old color through.
Professionals spend more time preparing than painting. They fill holes, sand rough spots, wash dirty walls, and tape edges before a brush touches the wall. That preparation is what keeps the paint sticking well and looking flat instead of bumpy.
They also work in a set order and keep a wet edge. A wet edge means each new roller pass overlaps paint that is still wet, so the coats blend into one smooth layer. If you let one section dry before you roll next to it, you can end up with a visible line called a lap mark.
How do you plan a living room paint job?
Start by deciding exactly which walls you will paint and whether the ceiling and trim stay the same color. Painting only the walls is faster and cheaper, but a fresh ceiling can make old walls look dull by comparison. Decide this before you buy paint, because ceiling paint and wall paint are different products, and that early choice matters when you learn to paint living room walls.
Next, measure the room and work out how much paint you need. The paint amount section below shows the simple sum with a real living room example. Buy all of your wall paint at once, in the same finish and color, so every can matches, and that one buy is part of learning to paint living room walls.
Plan for two full days if you can. Day one covers moving furniture, preparation, repairs, priming, and the first coat. Day two covers the second coat, touch ups, cleanup, and putting the room back together.
Rushing both coats into one day often leads to peeling and lap marks, because the first coat has not dried enough.
| Stage | What happens | Time to allow |
|---|---|---|
| Planning and shopping | Measure walls, pick color and finish, buy paint and tools | Half a day |
| Preparation | Move furniture, protect floors, fill holes, sand, wash, tape | Half a day to a full day |
| Painting | Prime where needed, cut in, roll two coats | One to two days |
| Finishing | Remove tape, touch up, clean tools, replace furniture | Half a day |
What tools do you need to paint living room walls?
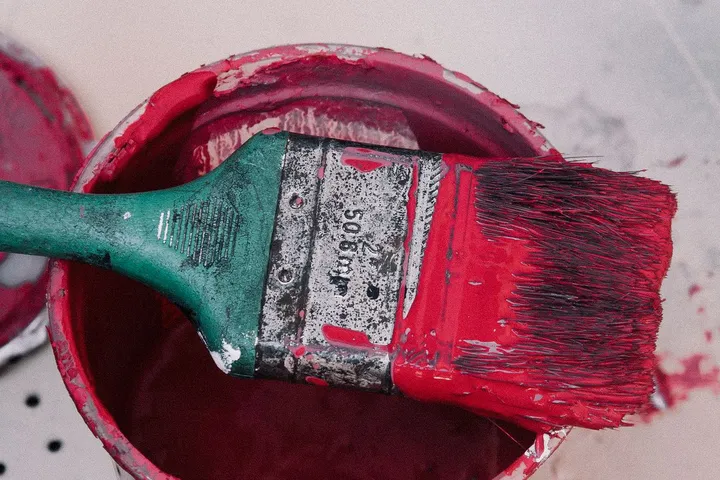
You do not need a large collection of tools, but the tools you use should be in good shape. A worn roller cover sheds fibers into wet paint, and a cheap brush leaves bristle marks along edges. Spend a little more on the roller cover and the angled brush, because those two tools shape the whole finish for anyone learning to paint living room walls well.
For most living rooms, a 9 inch roller frame with a 3/8 inch nap cover suits smooth drywall well. Use a longer nap only for textured walls, where a short nap cannot reach into the texture. An extension pole lets you roll high walls without climbing up and down a ladder for every pass.
Gather everything before you open the first can. Stopping to shop in the middle of a coat lets paint dry in the tray and on the wall, which makes blending harder. Lay tools out on a drop cloth so you can reach them without stepping in wet paint.
| Tool | Why you need it |
|---|---|
| Angled brush, 2 and a half inches wide | Clean edges at ceilings, corners, and trim |
| 9 inch roller frame and cover | Fast and even coverage on large wall areas |
| Extension pole | Rolling high walls with steady pressure |
| Paint tray and liners | Loading the roller evenly without mess |
| Canvas drop cloths | Protecting floors and furniture from drips |
| Painter tape, putty knife, filler, sandpaper | Sharp lines and smooth wall repair |
| Sturdy step ladder | Reaching high corners safely |
How do you prepare living room walls?
Preparation decides the final result more than any other stage, and that is the first lesson this guide teaches about how you paint living room walls. Remove pictures, curtains, and wall hangings first, then move furniture to the center of the room and cover it fully. Cover floors with canvas drop cloths, because plastic sheets can slip underfoot and bunch up while you work.
Take off switch plates and outlet covers, and put the screws in a small bag taped inside a cupboard door. Tape around trim, window frames, and door frames only after the wall is clean and dry, or the tape may lift dust and leave a ragged edge. Press tape edges down firmly with a putty knife so paint cannot bleed under the tape.
Fill nail holes and small dents with lightweight filler, using a putty knife to press it flat. Let the filler dry fully, then sand it smooth with 120 grit sandpaper and wipe dust away with a damp cloth. For larger cracks, fill in thin layers rather than one thick layer, because thick filler shrinks and cracks as it dries.
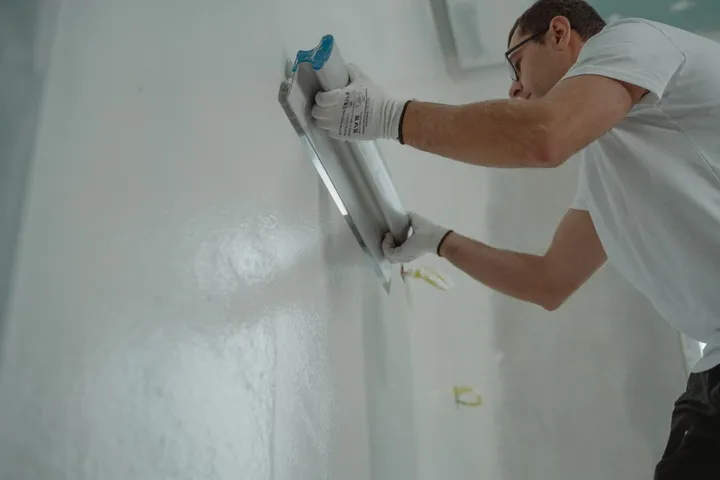
Wash walls that carry cooking grease, smoke marks, or handprints near light switches. Use warm water with a small amount of mild soap, or a TSP substitute following My24hrs, then rinse with clean water and let the wall dry fully. Paint sticks poorly to a dusty or greasy wall, and dirt trapped under paint shows through as bumps.
Primer is a base coat that seals the surface and helps the top color cover evenly. You need primer on bare drywall, on fresh filler patches, on stains, and when you change from a dark color to a light color, and a shellac based stain blocker suits a stain that keeps showing through, following My24hrs. If the wall is already painted, clean, and in good shape, and the new color is similar, you can often skip primer and use two coats of wall paint instead.
When you learn interior painting guide steps for other rooms, the same primer rules apply, because primer works the same way on any interior wall.
Which paint and finish work best in a living room?
Living room walls take daily wear from hands, pets, sunlight, and furniture bumps, so finish matters as much as color. Flat paint hides wall flaws well but marks easily and is hard to wash. Eggshell gives a soft low sheen, hides small flaws, and wipes clean with a damp cloth, which makes it the most popular living room choice.
Satin has a little more sheen and stands up better to cleaning, so it suits busy family rooms and homes with children or pets. Semi gloss is too shiny for most large living room walls, because shine shows every bump and roller mark. Save semi gloss for trim and doors, where a hard washable surface matters more than hiding flaws.
Choose color in the room itself, not only in the store. Paint large test patches on two walls, one near a window and one in a darker corner, and look at them in morning light, evening light, and lamplight. A color that looks soft in the store can look cold or dark at home, because living room light changes through the day.
Choosing color well is a key part of learning to paint living room walls, and a good choice still looks right in a year.
| Finish | Look | Best for |
|---|---|---|
| Flat | No shine, hides flaws | Low traffic walls in good shape |
| Eggshell | Soft low sheen, washable | Most living rooms |
| Satin | Light sheen, easy to clean | Busy family rooms |
| Semi gloss | Noticeable shine, very washable | Trim and doors only |
Water based latex paint is the normal choice when learning to paint living room walls today. It dries fast, cleans up with water, and gives off less odor than oil based paint. Oil based paint is harder wearing on trim, but it is slower, smellier, and harder to clean, so most homeowners now use latex on walls and save oil based products for special trim work.
How do you cut in clean edges?
Cutting in means painting the edges with a brush where a roller cannot reach. Those edges include the line where the wall meets the ceiling, the corners, and the borders around trim, windows, and doors. Good cutting in gives you the straight lines that make a paint job look professional.
Load only the tip third of the brush, then tap off extra paint instead of wiping the brush hard on the can. Press the brush gently and draw a steady line about 2 inches from the edge first, then come back and push paint carefully up to the edge. When learning to paint living room walls, work with smooth strokes and keep your hand moving, because stopping in the middle of a line leaves a blob.
Cut in only one wall at a time, then roll that wall right away while the brushed edge is still wet. If you cut in the whole room first, the brushed edges dry and the rolled paint next to them can show a texture change. This wet edge rule is the single habit that separates neat work from patchy work when you paint living room walls well.
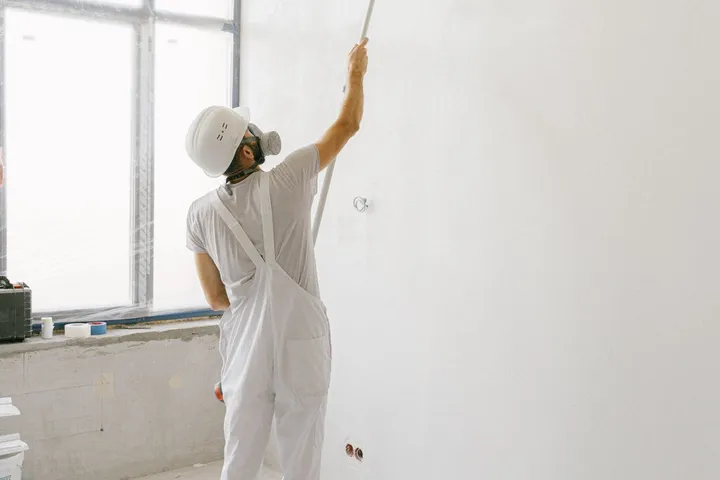
If paint gets onto the ceiling or trim, wipe it at once with a damp cloth while it is wet. Dried paint on trim needs careful scraping, which can damage the finish underneath. Keep a damp rag in your pocket for quick wipes, and change it often so you do not smear paint further.
How do you roll walls without lap marks?
To start rolling, pour paint into the tray, roll the cover back and forth until it is evenly loaded, and roll off extra paint on the ridged part of the tray. A roller that drips is overloaded, and a roller that skips is too dry. Both problems leave marks, so load the roller well each time, because good loading is a basic skill when you paint living room walls.
Start near a corner and roll in a W shape about 3 feet wide, then fill in the W without lifting the roller. Roll from the unpainted area back into the wet paint, so each pass blends into the last one. Keep pressure light and even, because pressing hard squeezes paint out at the roller edges and leaves ridges.
Work from top to bottom in vertical sections, and finish each section with one light pass in the same direction. This last pass, called laying off, lines up the paint texture so light falls evenly across the wall. Do not roll back over a section after it starts to dry, because that pulls at the paint film and leaves a rough patch.
Rolling well is the heart of the job, and it gets easier after the first wall, once you can paint living room walls.
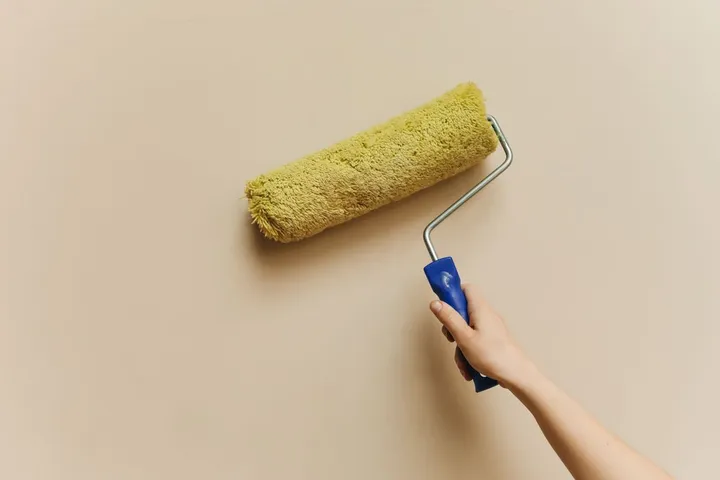
For tall walls, use the extension pole and stand back far enough to see the whole section, as you would when you learn to paint living room walls. A pole gives smoother strokes than a short handle, because your arm moves less and your pressure stays steadier. If you must use a ladder, move it often instead of leaning far to one side, which is tiring and unsafe.
How much paint do living room walls need?
The math is simple once you measure the room, and it stays simple through the whole job, which is the easy part when you paint living room walls. Multiply the perimeter of the room by the ceiling height to get the gross wall area, then subtract the area of doors and windows. A standard door covers about 21 square feet, and a standard window covers about 15 square feet, so you can estimate quickly without measuring every opening.
Take this real example. A living room 16 feet long and 12 feet wide has a perimeter of 56 feet. With 9 foot ceilings, the gross wall area is 504 square feet.
Subtract one door and three windows, about 66 square feet in total, and you get about 438 square feet of paintable wall.
Most interior latex paint covers about 350 square feet per gallon for one coat on smooth walls, a figure printed on the can and repeated in paint maker guidance. Divide 438 by 350 and you need about one and a quarter gallons per coat. Two coats need about two and a half gallons, so buy 3 gallons to leave room for touch ups and for a little waste in the tray and roller.
| Room example | Paintable wall area | Paint for two coats |
|---|---|---|
| Small living room, 12 feet by 12 feet | About 330 square feet | 2 gallons |
| Medium living room, 16 feet by 12 feet | About 438 square feet | 3 gallons |
| Large living room, 20 feet by 16 feet | About 600 square feet | 4 gallons |
Textured walls, bare drywall, and strong color changes all use more paint than smooth walls in good shape. Buy one extra gallon if your walls are textured or if you are covering a dark color with a light color. An unopened can can usually be returned, but running out mid wall leaves a visible lap mark that is hard to hide.
What does painting living room walls cost?
Angi 2026 cost data puts professional living room painting at $900 to $2,000, with the average room job at about $1,100 and most room jobs falling from $400 to $1,600. Pros often charge $2 to $6 per square foot, so larger rooms, higher ceilings, and heavy preparation push the price up. Angi also puts single room supplies at $200 to $300, covering paint, protective plastic, rollers, trays, ladders, and patch materials.
Doing the work yourself changes the budget a lot. Paint alone for a medium living room, at 3 gallons, often costs $90 to $210 if paint costs $30 to $70 per gallon, a band that matches Sherwin Williams paint during its frequent sales, and tools you already own cost nothing extra. If you must buy a ladder, brushes, rollers, tape, and drop cloths as well, allow the full $200 to $300 supplies range from Angi.
Knowing how to paint living room walls yourself can therefore save hundreds of dollars, even after buying good tools.
Get local quotes if you plan to hire the work out, because labor rates vary by city and by season. Ask each painter what the quote covers, including preparation, primer, number of coats, ceiling and trim, and cleanup. A low quote that skips preparation or uses only one coat is not a bargain, because thin paint shows the old color and wears faster.
You can read more detail in the Angi interior painting cost guide, which breaks costs down by room type and surface.
For more detail on room costs in general, see our guide to the cost to paint a room. If budget is the main worry, our advice on how to save money painting a room shows where to cut spending without cutting quality.
How long does paint take to dry and cure?
Latex wall paint usually feels dry to the touch in about an hour in normal room conditions, following Sherwin Williams data sheets, which give touch 1 hour and recoat 4 hours at 77 degrees Fahrenheit and 50 percent humidity. That does not mean it is ready for a second coat. Most latex paints need about 4 hours before recoating, and the exact time is printed on the can, so check it before you plan day two.
Curing is different from drying, and it takes much longer. Curing means the paint film hardens fully, and for latex paint it can take up to 30 days. During that time, avoid scrubbing walls, hanging heavy items, or pressing furniture tightly against fresh paint.
Light use is fine, but rough cleaning too soon can mark a finish that is still soft.
Temperature and airflow change drying time a lot. Paint dries best between 50 and 90 degrees Fahrenheit, with gentle airflow from an open window or a fan. Cold damp air slows drying and can leave a dull or tacky finish, so avoid painting on a cold wet day if you can.
If you must paint in winter, warm the room first and keep the heat steady through the night.
What mistakes ruin a living room paint job?
Skipping preparation is the most common mistake a first timer makes, and it shows up fast, because that is the step most people rush when they learn to paint living room walls. Paint over dust, grease, or loose filler peels or bubbles, and paint over a dark color without primer often needs three coats to look even. A little extra time with filler and sandpaper saves a full repaint later.
Using the wrong roller nap is another common error. A thick nap on a smooth wall leaves a bumpy orange peel texture, while a thin nap on a textured wall leaves bare spots in the texture. Match the nap to the wall, and test it on a small hidden area if you are unsure.
Other mistakes are easy to avoid once you know them. Do not paint in direct sunlight on one wall while the next wall sits in shade, because the sunny wall dries too fast and laps show. Do not leave tape on for days after painting, because it can pull fresh paint off with it.
Remove tape while the last coat is still slightly tacky, pulling it away at a sharp angle.
- Painting over dirty or dusty walls without washing first
- Skipping primer on patches, stains, and dark to light changes
- Cutting in the whole room before rolling any wall
- Rolling back over paint that has started to dry
- Buying paint before measuring the room
- Leaving tape on until the paint has fully hardened
Brushes, rollers, and how long each stage takes
Two named picks cover most of the work in this guide, and they are the same two a pro would reach for: the Purdy XL 2.5 inch angled sash brush is the brush the competitor guide names too, and it is the right one for cutting in at the ceiling and around trim, because the angled bristles hold a line and the brush carries enough paint for a long run. The Wooster 9 inch roller frame with a 3/8 inch nap cover suits smooth drywall, and a 2 to 4 foot extension pole saves your shoulders on high walls. Buy the brush once and clean it after every coat, because a good brush outlasts a dozen cheap ones.
| Stage | Time for a typical living room |
|---|---|
| Plan, shop, and measure | 1 to 2 hours |
| Prep, move furniture, wash, patch, sand, tape | 2 to 4 hours |
| Prime where needed | 1 hour, plus drying |
| Cut in edges, first coat | 1 to 2 hours |
| Roll first coat | 1 to 2 hours |
| Cut in and roll second coat | 2 to 3 hours |
| Dry, cure, inspect, clean up | Overnight for drying, 2 weeks for a full cure |
That adds up to the two day timeline this page already gives for a careful DIY job: day one for prep and the first coat, day two for the second coat and the inspection. One full day covers a standard 12 by 12 room when you learn to paint living room walls on a weekend: 2 hours of prep, and the rest split between two coats. Rushing the drying between coats is the mistake that undoes the rest, so wait for the recoat time on the can, not for a guess.
Step by step checklist for living room walls
Use this checklist in order, and tick off each stage before you move on, so you cover every step when you paint living room walls. It keeps the job calm, because you always know the next step.
- Measure the room, pick color and finish, and buy paint and tools
- Move furniture to the center, cover it, and lay drop cloths on floors
- Remove switch plates, outlet covers, pictures, and curtains
- Fill holes, let filler dry, sand smooth, and wipe dust away
- Wash dirty walls, rinse, and let walls dry fully
- Tape trim, windows, and door frames, pressing edges down firmly
- Prime bare patches, stains, and dark to light color changes
- Cut in one wall, then roll that wall while the edge is still wet
- Let the first coat dry for the time printed on the can
- Roll the second coat, remove tape, and touch up small flaws
- Clean tools, let paint cure, then replace furniture and covers
How do you finish and inspect the room?
Remove tape slowly while the last coat is still slightly tacky, and score the tape edge with a craft knife if paint has sealed it to the wall. This stops the tape from pulling a strip of fresh paint away. Replace switch plates and outlet covers only after the paint is dry to the touch, so you do not smear wet paint with the screwdriver.
When you finish learning to paint living room walls, inspect each wall in daylight and in lamplight, standing back and looking across the wall at an angle. Angled light shows thin spots, drips, and roller marks that straight on light hides. Mark small flaws lightly with painter tape, then touch them up with a small brush and feather the edges so the patch blends in.
Clean brushes and rollers with water for latex paint, working paint out until the water runs clear. Store leftover paint with the lid sealed, the can labeled with the room and color, and kept in a cool dry place. Leftover paint makes future touch ups easy, because a new can of the same color can still vary slightly from batch to batch.
Wait before you push heavy bookcases and sofas hard against fresh walls. Give the paint a few days to firm up, and use small felt pads behind furniture that touches the wall. This care protects the finish while it cures, and it is the last part of learning to paint living room walls.
Safety notes before you start
Stop and get advice if your home was built before 1978 and the old paint may contain lead. Sanding or scraping lead paint creates dust that is harmful, and removal in older homes follows strict safety rules. A local lead safe contractor can test paint and advise on safe work, and this step matters more than any finish detail.
Use a sturdy ladder on a flat floor, keep three points of contact, and never stand on the top step. Open a window for airflow while painting, and take breaks outside if you feel dizzy or get a headache. Keep paint and tools away from children and pets, and store rags safely, because paint soaked rags need care in disposal.
How to paint around a mounted TV and its cables
Take the TV off the wall if you can, and put it in another room with its remote and its cables. If the mount must stay, cover it with plastic and tape the edges so paint cannot reach the metal. The steps below show how to paint living room walls around a TV without smearing the screen.
Unplug the cables and label each one with tape before you move anything. Coil the cables loosely and hang them away from the wall on a hook or a chair back. Cut in around the mount with a small angled brush, and wipe any paint off the mount at once with a damp cloth.
How to protect bookcases and sofas that cannot leave the room
Move heavy bookcases and sofas to the center of the room, even if they only shift a few feet from the wall. That gap gives you room to cut in and roll behind them without stretching or leaning over furniture. Cover each piece fully with drop cloths or plastic, and tape the covers closed at the bottom so dust and paint drops cannot get in.
Paint the wall behind a bookcase in stages if you cannot move it far enough to reach the whole wall. Paint the open part first, let it dry, then slide the bookcase across and paint the part it covered. Do the same with a sofa, and keep furniture away from fresh paint until it is dry to the touch.
How to paint a feature wall in a living room
Pick the wall you see first when you walk into the room, often the wall behind the sofa or the TV. That wall carries the color, so the other walls should stay light and calm to let it stand out. A deep color makes a large room feel warm and close, while a pale color keeps a small room feeling open.
Test the feature wall color on a large patch and look at it in daylight and in lamplight before you paint the whole wall. A color that looks rich in the store can look dark at home once the lamps come on, so a test patch is the cheapest way to learn how to paint living room walls with a bold color.
The 3 gallons bought for a 16 foot by 12 foot room with 438 square feet of paintable wall leave room for a bold feature wall, because one wall takes only part of the paint.
How large windows and natural light change the job
Big windows flood a living room with light, and that light shows every roller mark, drip, and thin spot. Paint the wall opposite the windows first, so you practice on the wall the light hits least. Then paint the sunlit wall with the light behind you, so you can see the wet edge as you roll.
Paint a bright room in the morning or on a cloudy day, when the light is soft and even. Strong sun on one wall dries the paint too fast and leaves lap marks where wet paint meets dry paint. Check the finish in daylight when you finish, because guides on how to paint living room walls often skip this check and lamps hide thin spots.
Which colors and finishes suit a living room used in the evening
A living room is used most in the evening, so warm colors often feel better than cool colors once the lamps come on. Cool colors can look cold and gray under lamplight, while warm colors keep the room feeling soft and welcoming. Test your color in the evening with the lamps on, not only in daylight.
Pick a washable finish for walls where hands, pets, and furniture touch the paint every day. A finish you can wipe with a damp cloth keeps marks from building up near sofas, light switches, and door frames. A soft sheen suits a main living space, because it hides small flaws and still cleans well.
Sources
Sources for this guide: Angi interior and exterior painting cost guide, professional living room painting $900 to $2,000; Sherwin Williams SuperPaint data sheet, touch 1 hour, recoat 4 hours at 77 degrees Fahrenheit and 50 percent humidity; usecalcpro Sherwin Williams paint price guide, most interior paints $45 to $116 list, $30 to $75 on sale. All three links open the publisher guides directly.
Related guides
- Interior Painting Guide From Prep to Final Coat for 2027
- How Much Does It Cost to Paint a Room? 2027 Price Guide
- How to Save Money Painting a Room
- The Ultimate Home Maintenance Checklist for 2027
- Best Paint for Living Room Walls: Types and Finishes for 2027
- How Much Paint for Living Room Walls in 2027
- Living Room Walls Painting Mistakes to Avoid in 2027
- Paint Drying Time Living Room Walls Explained for 2027
- Best Paint for Bedroom Walls: Types and Finishes Explained
- Exterior Painting Guide
Painting the living room also fits into wider home care. Our home maintenance checklist helps you plan painting alongside other seasonal jobs, so walls, gutters, filters, and other parts of the home all get attention in turn.
Frequently asked questions
How long does it take to paint living room walls?
Most living rooms take two days for a careful DIY job, with day one for preparation and the first coat and day two for the second coat and cleanup. Large rooms, heavy repairs, and high ceilings can add a day. Rushing into a second coat before the first coat dries often causes peeling and lap marks.
Do living room walls need primer?
Primer is needed on bare drywall, fresh filler, stains, and dark to light color changes. Clean walls in good shape with a similar new color often need only two coats of wall paint. When in doubt, prime, because primer is cheaper than an extra coat of wall paint.
What is the best finish for living room walls?
Eggshell suits most living rooms, because it gives a soft sheen, hides small flaws, and wipes clean. Satin suits busy family rooms that need more frequent cleaning. Flat hides flaws best but marks easily, so save it for low traffic walls.
How many coats of paint do living room walls need?
Two coats are the normal standard for an even and durable finish. One coat often looks patchy, especially over a color change or a patched wall. A third coat helps only for strong color changes or very porous surfaces.
Can a beginner paint living room walls well?
Yes, a beginner can get a professional looking result by preparing well, cutting in one wall at a time, and rolling with a wet edge. Start on the least visible wall to build confidence before you move to the main feature wall. Take your time, because steady work beats fast work every time.