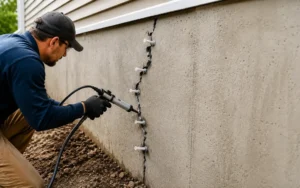

Exterior Painting Guide From Planning to Final Coat for 2027
Walk the walls, wash the siding, caulk, prime, and roll two even coats that stand up to rain, sun, and winter cold. That sequence is this exterior painting guide in short: wash first, because paint will not stick to dirt, mildew, or chalky old paint, however good the can claims to be.
Outside paint does more than change how a house looks from the street. It is the skin that keeps rain out of wood, stucco, and fiber cement siding, and it slows damage from sun, wind, and frost. When that skin cracks, peels, or thins, water gets into joints and boards and small repairs turn into rot repair.
A good exterior job is mostly preparation. Washing, scraping, sanding, caulking, and priming take longer than rolling paint, and they decide whether the finish lasts seven years or starts peeling in two. The focus here stays on that work, with real costs, paint amounts for a real house, and the weather rules that protect a new coat, because that is what this exterior painting guide is for: real numbers, not promises.
How Do You Plan an Exterior Painting Project?
Start with a slow walk around the house, notebook in hand. Look for peeling paint, cracked caulk, soft wood, mildew stains, rust marks from nails, and gaps where siding meets trim, windows, and doors. Mark each spot with painter tape so nothing is missed when work starts.
Note the siding on each wall, because wood, vinyl, stucco, brick, and fiber cement each need a different approach. Wood needs scraping and spot priming, vinyl needs a light wash and a paint made for vinyl, and masonry needs a primer made for porous surfaces. The indoor process is different in almost every step, and it is covered in our interior painting guide.
Plan the job across several dry days, not one rushed weekend, and carve out a month in the dry season where you can. A single story home in good shape may take three to five days for one careful worker, while a two story home with heavy prep can take a full week or more. Book extra days for rain, because paint applied before rain can wash, spot, or blister, and an exterior painting guide that promises the job in a day is selling you a shortcut.
What Tools and Paint Do You Need?
Exterior work needs sturdier gear than a bedroom repaint. Buy an extension ladder that reaches the eaves with three rungs to spare, a sturdy roller frame with an extension pole, a three inch angled brush for trim, and a sprayer only if you already know how to control overspray. A cheap ladder or a wobbly roller frame costs time and risks a fall, and a ladder that reaches the eaves with three rungs to spare is the first thing this exterior painting guide checks, because a short ladder is how jobs turn into falls.
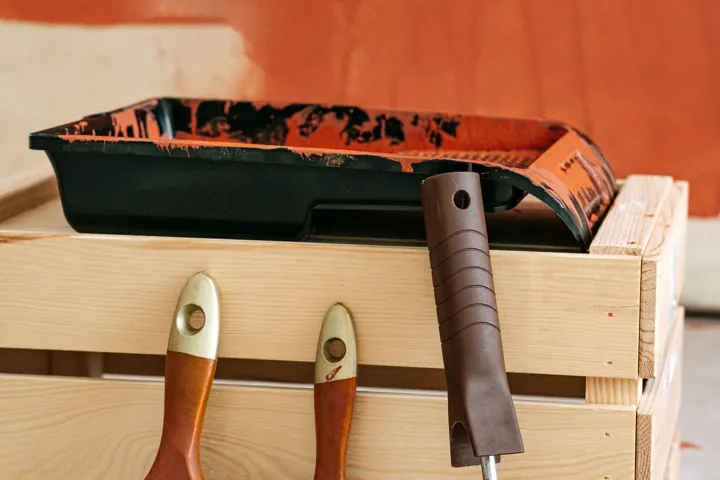
Choose 100 percent acrylic latex paint made for exterior use. Acrylic latex flexes as siding expands and contracts with heat and cold, it resists cracking better than older oil based paint, and it cleans up with water. Oil based paint still has a place on some metal surfaces, but for most siding acrylic latex is the safer choice.
| Tool or material | What it does | What to buy |
|---|---|---|
| Extension ladder | Reaches eaves and upper walls safely | One ladder rated for your weight plus tools |
| Roller frame and pole | Covers large siding areas fast | Sturdy frame plus a pole that locks at length |
| Angled brush, 3 inch | Paints trim, corners, and window frames | One good synthetic brush, not a multipack |
| Pressure washer | Cleans dirt, mildew, and chalking paint | Rent one with an adjustable nozzle |
| Scraper and sanding sponge | Removes loose paint and smooths edges | One stiff scraper and 80 grit plus 120 grit sponges |
| Caulk gun and exterior caulk | Seals joints against rain | Paintable exterior caulk, not bathroom caulk |
| Drop cloths and masking tape | Protects plants, paths, and windows | Canvas cloths that stay flat in wind |
How Do You Wash and Prepare Exterior Walls?
Wash every wall before you scrape or sand. Paint will not stick well to dirt, mildew, or chalky old paint, and a clean wall shows every crack and soft spot that needs repair. Use a pressure washer on a low setting, work from the top down, and keep the nozzle moving so water is not driven behind siding or trim, because washing first is the step this exterior painting guide refuses to skip, and paint will not stick to dirt.
Let the walls dry fully, at least 24 to 48 hours after washing, before priming or painting. Painting over damp wood traps moisture under the new coat, and trapped moisture is a common cause of blistering and early peeling. If a wall still feels cool and damp in the shade, give it another day.
Scrape every loose and peeling section down to sound paint or bare wood, then feather the edges with sandpaper so the new coat does not show a hard ridge. Fill small holes and dents with exterior filler, let it dry, and sand it smooth. Replace any board that feels soft or crumbly, because paint over rot only hides the problem for a season, and feather the edges well, because a hard ridge under new paint is the flaw this exterior painting guide sees most often on old houses.
How Do You Caulk and Prime Exterior Surfaces?
Start sealing with caulk at every joint where two materials meet, around windows and doors, along trim boards, and where siding meets corner boards. Cut the tip small, lay a steady bead, and smooth it with a wet finger so it fills the gap without a thick ridge. Remove old cracked caulk first, because new caulk over failed caulk will fail in the same place, and caulk is prep, not paint, and this exterior painting guide counts it that way because a sealed joint is what keeps water out of the wall.
Prime all bare wood, patched spots, and any surface where the old paint has worn thin. Primer seals porous wood, blocks stains, and gives the finish coat something even to grip. A full primer coat is needed when you change from a dark color to a light color, or when the old paint is badly weathered.
Spot priming is enough when the old coat is sound and only small areas are bare.
Use a stain blocking primer on knots, rust marks, and water stains, and a masonry primer on bare stucco, brick, or concrete block. The right primer costs little compared with a finish coat that peels, and it is the step most rushed jobs skip. Let primer dry for the time the can states before the finish coat goes on.
How Do You Choose Exterior Paint and Color?
Pick the finish by surface, not by how it looks in the can. Flat or matte finish hides flaws on large siding areas, satin finish suits most siding because it washes better than flat, and semi gloss finish belongs on trim, doors, and shutters where handling and rain wear hardest. A high gloss finish shows every dent, so keep it for small accent areas only, and pick the finish by surface, because flat on trim is a mistake that shows in a year, which is why this exterior painting guide picks by surface.

Test colors on the house itself before you buy gallons. Paint two large test patches, each about two feet square, on a sunlit wall and a shaded wall, and look at them in morning light, midday light, and evening light. Colors look darker and warmer outside than they look on a small swatch indoors, and a color that looks soft in the store can look harsh across a whole wall.
Keep the scheme simple: one main body color, one trim color, and one accent color for the front door or shutters. Match the body color to fixed features that will not change, such as the roof, brick, stone, and driveway. A house with a warm brown roof suits warm whites, tans, and sage greens, while a house with a gray roof suits cool grays, blues, and clean whites, and one main color, one trim, one accent is the scheme this exterior painting guide recommends for a house that has to look right from the street.
| Siding type | Finish that suits it | Watch out for |
|---|---|---|
| Wood siding | Satin finish | Scrape, sand, and spot prime all bare wood |
| Vinyl siding | Satin finish made for vinyl | Never paint vinyl a color darker than the original |
| Stucco | Flat or satin finish | Prime bare patches and fill hairline cracks first |
| Brick | Masonry paint, flat finish | Painted brick is hard to reverse, test first |
| Fiber cement | Satin finish | Prime cut edges and follow the maker guide |
How Do You Apply Exterior Paint?
Paint from the top of the house down, one wall at a time. Start at the eaves and gutters, then the main siding, then windows, doors, and trim last. Drips from upper work land on unpainted siding below, where the next pass covers them, instead of on finished trim, and that is why this exterior painting guide works top down.

Work in shade when you can, and follow the shade around the house through the day. Paint applied in strong direct sun can dry too fast, which leaves brush marks, lap marks, and a weak bond, and a dark wall can run 20 degrees hotter than the air, following TurboOrchid. Sherwin Williams advises painting when temperatures sit between 50 degrees Fahrenheit and 90 degrees Fahrenheit, and allowing 4 to 6 hours between coats.
Use a brush for trim and edges, a roller for large flat siding, and a sprayer only for large areas with careful masking of windows, roofs, plants, and cars. When spraying, back roll each section with a roller while the paint is still wet, so the coat is pushed into the surface instead of sitting on top of it. Two thin coats always beat one thick coat, because a thick coat sags, cracks, and peels sooner.
How Much Paint Do You Need?
Measure the paintable wall area, not the floor area of the house. Walk each wall, multiply its length by its height, add the walls together, then subtract about 15 percent for windows and doors. Sherwin Williams notes that one gallon of exterior paint covers about 250 to 400 square feet, so use 350 square feet per gallon as a planning figure for walls in average shape, and measure the walls, not the floor, because this exterior painting guide does the maths that way, and a gallon short on a Sunday is the oldest story in painting.
Take a single story home as a specific example. Its walls measure 160 feet around the outside and 9 feet high, which gives 1,440 square feet of wall. After subtracting windows and doors, about 1,224 square feet remains to paint.
At 350 square feet per gallon, one coat needs about 3 and a half gallons, two coats need about 7 gallons, and buying 8 gallons leaves paint for touch ups.
| Home size | Paintable wall area | Gallons for two coats |
|---|---|---|
| Small single story home | About 1,000 square feet | About 6 gallons |
| Average single story home | About 1,224 square feet | About 7 to 8 gallons |
| Average two story home | About 2,000 square feet | About 12 gallons |
| Large two story home | About 3,000 square feet | About 18 gallons |
Buy all the paint for the body color at once, and mix the cans together in a large bucket before you start. This step, called boxing, keeps the color even across walls, because small differences between cans show up as bands on a large wall. Label any leftover paint with the color name, finish, and the wall it was used on.
How Much Does Exterior Painting Cost?
Angi 2026 cost data puts the national average cost to paint a house exterior at $3,178, with most homeowners paying $1,819 to $4,551. The rate per square foot of paintable wall runs $1.50 to $4, and complex homes with heavy prep, tall walls, or hard access can reach $7,700, at the top of the full national spread of $600 to $7,700 in the same Angi 2026 data. Labor is the largest share of the bill, not the paint, because washing, scraping, caulking, and working at height take far longer than rolling.
Doing the same job yourself costs far less in cash but far more in time. Paint, primer, caulk, brushes, rollers, drop cloths, and a rented pressure washer for an average home often run $400 to $1,800 for materials alone, based on the Angi supplies range and typical retail prices, and Angi puts a do it yourself job at about $750 in materials alone. A ladder, sprayer rental, or scaffold hire can add several hundred dollars more, and a fall or a ruined finish can erase the saving at once.
The cost to paint a room indoors is a useful comparison, because interior work skips washing, weather delays, and ladder work, yet still runs into hundreds of dollars per room. Exterior work adds height, weather, and surface repair, which is why quotes for the outside of a house run well above a single room indoors. Get three written quotes for a hired job, each listing prep, primer, coats, paint brand, and warranty in writing, and compare them by scope, because that is how this exterior painting guide tells a fair price from a cheap one.
What Weather Makes Exterior Paint Fail?
Paint needs a dry surface, mild temperature, and time to cure, and missing any one of these shortens its life. Do not paint when rain is forecast within 24 hours, when morning dew still sits on the walls, or when humidity stays above 85 percent all day, following TurboOrchid. A coat that gets wet before it skins over can spot, run, or wash thin, and paint needs a dry surface, mild temperature, and time to cure, which this exterior painting guide treats as non negotiable.
Heat is just as risky as cold. Above 90 degrees Fahrenheit, latex paint can skin over before it bonds, which leaves a film that peels in sheets. Below 50 degrees Fahrenheit, it may not cure at all, and a cold night soon after painting can ruin a coat that looked fine at noon.
Aim for the middle of the range, with dry air and light wind, and stop early enough that the last coat dries before evening dew.
Plan the season around your climate. Late spring and early fall suit most regions, because days are mild and rain is less frequent than in summer storm season. In hot regions, paint in spring or fall and work the shaded side of the house.
In cold regions, finish at least a month before the first hard frost, so the coat cures fully before winter.
When Should You Stop and Hire a Professional?
Stop for a professional quote when the work leaves the ground, the siding is damaged, or the paint may contain lead. Tall two story walls, steep roofs, and rotted boards need scaffolding, repair skill, and fall protection that most homeowners do not own. A painter who works at height every day carries the gear and insurance for that risk, and stop for a professional quote when the work leaves the ground, because that is the line this exterior painting guide draws between DIY and a pro.
Lead paint needs special care in any home built before 1978. Federal rules under the Renovation, Repair and Painting Rule require firms paid to disturb paint in such homes to be certified and to follow lead safe work practices when the work disturbs more than 20 square feet of exterior painted surface. Homeowners working on their own home are not covered by the same rule, but testing before scraping is still wise, and hiring a certified firm is the safer route for a whole house repaint.
As a safety note, never work from the top rungs of a ladder, never lean a ladder against a gutter alone, and never scrape dry paint on a pre 1978 home without checking for lead first. Keep children and pets away from scraping and sanding areas, cover soil and plants under the work area, and clean up chips and dust daily. If a wall feels soft, smells damp inside, or shows mold across a large area, pause and find the water source before painting over it.
How Do You Clean Up and Inspect the Finish?
Clean tools the same day, while paint is still wet. Wash latex brushes and rollers with warm water and soap, spin out excess water, and hang brushes bristle down to dry. Scrape dried paint from trays and roller frames, and store leftover paint in sealed cans away from frost and heat.
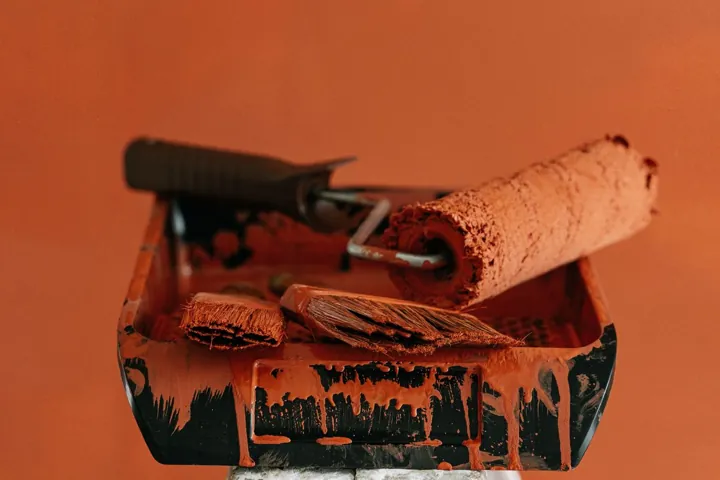
Inspect the finish in daylight from the ground and from a few steps back. Look for thin spots, missed edges, drips on trim, paint on glass, and uneven sheen where coats overlapped. Touch up thin spots with the same boxed paint, and remove paint from glass with a razor scraper held flat, after the paint has dried.
Keep a small amount of each color for future touch ups, and note the brand, color name, and finish on the can. Sherwin Williams notes that exterior paint lasts about 7 to 10 years, depending on climate, surface, and paint quality, and TurboOrchid puts wood at 7 to 10 years and stucco, brick, and fibre cement at 10 to 15 years, so a short yearly walk around the house will catch small cracks and peeling early, when a touch up still fixes them. Treat it as a cycle, not a one time job: wash yearly, caulk gaps as they open, and touch up before small failures spread, because that cycle is what this exterior painting guide is really about.
Reading paint failure: what each flaw means
Failed paint is a diagnosis, not just a mess, and each failure has its own cause and its own fix. This Old House lists the same three in every exterior guide, and they are worth learning before you scrape anything, and this exterior painting guide adds peeling, because it is the one homeowners meet most.
| Failure | What it looks like | Likely cause | Fix |
|---|---|---|---|
| Alligatoring | Wide cracks like dried mud, in a pattern | Old paint layers shrinking, or a topcoat over a brittle undercoat | Strip back to sound paint or bare wood, then prime |
| Blistering | Bubbles that peel away from the wall | Moisture under the paint, or painting in hot sun | Find the moisture first, let the wall dry, then repaint in shade |
| Chalking | White powder on your hand when you touch the wall | Paint binder breaking down in sun and weather | Wash the wall well, then repaint over a sound surface |
| Peeling | Sheets lifting off, often near joints | Paint over dirt, damp wood, or failed caulk | Scrape, clean, recaulk, prime bare spots, repaint |
On lifespan, two figures in the guides disagree and both are right in their own way. Sherwin Williams puts exterior paint at 7 to 10 years, which is the typical life of a normal job, and This Old House says a good job with top materials and thorough prep should last a good 15 years. Plan on 7 to 10, aim for 15 with full prep, and judge by the wall in front of you, not by the can, and that is the honest answer this exterior painting guide gives, not a promise from a paint can.
What Mistakes Ruin an Exterior Paint Job?
Most failed exterior jobs share the same short list of causes, and all of them are avoidable with patience. Read the list before you open a can, and check each item as you work through the house, because this exterior painting guide lists them so you can avoid all of them with patience.
- Painting over dirt, mildew, or chalky paint without washing first
- Skipping primer on bare wood, patches, and stained areas
- Painting in direct sun, high humidity, or before rain
- Applying one thick coat instead of two thin coats
- Caulking after painting, or using caulk that paint cannot grip
- Painting vinyl siding a color darker than the original color
- Ignoring soft wood, rot, and leaks behind peeling paint
- Leaving windows, plants, and paths unmasked during spraying
Seasonal care belongs on the same calendar as the paint job itself, and it is covered in our home maintenance checklist. A yearly wash, a caulk check each spring, and a touch up each fall cost little and add years to a finish.
Sources for this exterior painting guide: Sherwin Williams exterior painting guide, paint between 50 and 90 degrees Fahrenheit, 4 to 6 hours between coats; Maryland Department of Labor lead paint FAQs, Renovation, Repair and Painting Rule, 20 square feet exterior. Both links open the publisher guides directly.
Related guides
- Interior Painting Guide From Prep to Final Coat for 2027
- How Much Does It Cost to Paint a Room? 2027 Price Guide
- The Ultimate Home Maintenance Checklist for 2027
- How Much Does Painting a House Cost in 2027
- How Much Does Exterior Painting Cost in 2027
- How Much Does a New Front Door Cost in 2027
- How to Estimate Exterior House Painting in 2027
Frequently Asked Questions
How long does exterior paint last?
Exterior paint lasts about 7 to 10 years on most homes, according to Sherwin Williams, with climate, siding type, and paint quality deciding where a home lands in that range. South facing walls and coastal homes wear faster, while shaded walls in mild climates last longer. Yearly washing and prompt touch ups stretch the life of any coat.
How many coats of exterior paint do you need?
Two finish coats over primer is the standard for a lasting exterior job, with spot primer on bare areas and a full primer coat on weathered or repainted surfaces. One coat rarely covers evenly and leaves thin spots that fail first. Two thin coats bond better, hide better, and resist weather longer than one thick coat.
Can you paint vinyl siding?
Yes, you can paint vinyl siding with acrylic latex paint made for vinyl, provided the new color is no darker than the original color. Dark colors absorb more heat, which can warp vinyl panels and void some maker warranties. Wash the siding well, use a vinyl safe product, and test a small section first.
Do you need to prime before painting a house exterior?
Yes, prime all bare wood, filler, patches, and stained areas, and prime fully when the old coat is badly weathered or when you change from dark to light. Sound old paint in good shape needs spot priming only, not a full coat. Primer seals porous surfaces, blocks stains, and helps the finish coat grip and last.
What temperature is best for exterior painting?
The best temperature for exterior painting sits between 50 degrees Fahrenheit and 90 degrees Fahrenheit, with dry air and no rain forecast for at least 24 hours. Work in shade where possible, and avoid painting on very humid days or when evening dew will settle before the coat dries. Check the paint can, because some products allow a wider range, though that 50 to 90 degree band is the range this exterior painting guide uses, with dry air and no rain forecast for at least 24 hours.