DIY Basics for Homeowners: Essential Skills to Learn in 2027
Start with three shut offs, a small toolkit, and one 30 minute skill, and most small home jobs stop feeling risky. That is the whole of diy basics for homeowners: learn the shut offs first, fix small problems early, and know clearly when a job belongs to a licensed pro.
Most homes do not need a workshop full of gear or years of trade training to stay in good repair. They need an owner who can tighten, patch, seal, measure, and check the simple systems on a regular rhythm, and who knows which jobs to hand to a licensed pro without hesitating. That is the whole of DIY basics for homeowners, and it fits in one month of evenings.
What Are DIY Basics for Homeowners?
Basic home skills are practical jobs you can learn by doing them slowly, with the right tool and a clear stopping point. Patching a nail hole, hanging a shelf on a stud, changing a filter, and resealing a bath edge all sit in this group. Each job is small, reversible, and easy to check when you finish.
The line matters as much as the skill in any guide to DIY basics for homeowners. Gas lines, main electrical panel work, structural changes, and major plumbing inside walls belong to licensed pros in most places. A confident beginner knows that line and respects it, because the cheapest repair is the one that never creates a second, larger problem.
Think of these skills as home literacy rather than a trade. You do not need to rewire a house to change a light switch plate safely, and you do not need to replumb a bathroom to stop a dripping faucet from wasting water. Small competence, applied early and often, is what protects a home.
The Starter Toolkit That Covers Most Small Jobs
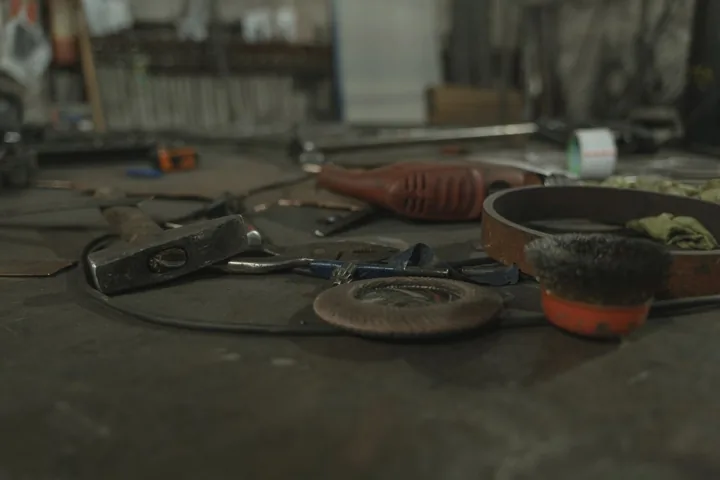
A small kit, kept in one box and returned to that box after every job, covers most beginner work, and a $5 drywall offcut from HowTo Bookshelf is the cheapest practice surface you will ever buy. Buy tools you can grip well and read easily, and learn each tool on a low risk job before you use it somewhere that matters. The table below is a practical starting point for a beginner, not a shopping list for a full workshop, and it covers DIY basics for homeowners in one place.
| Tool or item | What it does for you | First job to try it on |
|---|---|---|
| 25 foot tape measure | Measures rooms, furniture gaps, and shelf positions | Measure a wall before hanging a shelf |
| Claw hammer | Drives and pulls nails | Fix a loose nail in a baseboard |
| Phillips and flat head screwdrivers | Tighten and loosen most household screws | Tighten a loose cabinet handle |
| Cordless drill and driver with bits | Drills pilot holes and drives screws fast | Fit a shelf bracket into a stud |
| Adjustable wrench and pliers | Grip nuts, fittings, and small parts | Tighten a loose faucet fitting |
| Small level | Shows when a shelf or frame sits straight | Hang one picture frame level |
| Utility knife and putty knife | Trim, score, and spread filler neatly | Patch a small nail hole |
| Safety glasses and work gloves | Protect eyes and hands during dusty or sharp work | Wear them for every drilling and sanding job |
Keep spare consumables with the kit so a small job never stalls at the first step. A roll of painters tape, a tube of caulk, wall filler, sandpaper in coarse and fine grits, picture hooks, and a few common screws cover most first projects. Label the box, keep blades covered, and store the kit where you can reach it without climbing over stored boxes.
One habit saves more time than any single tool. After each job, wipe the tools, return them to the box, and note anything that ran out. A kit that is ready is a kit you will actually use, while a kit scattered across three drawers quietly pushes every small job toward a paid call out.
Safety First: The Skills That Protect You
Before you learn any repair, learn the three shut offs in your own home, because that is the first step, and every water job starts there. Find the main water shut off, the breaker panel, and the gas shut off if your home uses gas, and practice turning each one off and on while nothing is wrong. In a leak or an electrical scare, that calm familiarity is worth more than any tool in the box.
For electrical work, switch the circuit off at the breaker and test the fixture with a voltage tester before you touch a wire. For plumbing work, close the local shut off under the sink or beside the appliance, open a faucet to release pressure, and keep towels and a bucket close. For ladder work, keep three points of contact, never lean out past the side rails, and ask another person to foot the ladder for any job above head height.
Wear safety glasses for drilling, sanding, and any work overhead, and wear a dust mask when you sand filler or cut dusty material. Read the label on every product before you open it, especially paint, adhesive, and cleaning products, and keep children and pets out of the work area. If you cannot confirm that a spot is safe to drill, because you do not know what sits behind the wall, stop and find out first.
Know your stopping points before you start, because that judgment is a core part of DIY basics for homeowners. Repeated breaker trips, water inside a wall, a gas smell, cracks that grow across a ceiling, and any job that needs a permit are all reasons to call a licensed pro.
A good beginner is not the person who finishes every job alone. A good beginner is the person who finishes the safe jobs well and hands the risky jobs over early.
Seven Skills Worth Learning First
These seven skills put DIY basics for homeowners into action, because each one is common, cheap to practice, and useful in almost every home. Learn them in this order, and each new skill will reuse tools and habits from the one before it. Take your time, check your work, and repeat each skill on a low stakes spot before you use it in a visible room.
1. Patch a small wall hole and touch up paint
Small nail holes and dents are the kindest first repair. Press filler into the hole with a putty knife, scrape it flat, let it dry fully, sand it smooth with fine grit paper, and paint over it with a small brush. Two thin coats look better than one thick coat, and a quick wipe of dust before painting keeps the finish smooth.
This skill also teaches patience, which is the hidden skill behind most good home work. Rushing filler before it dries, or painting over dust, shows in the finish for years. Slow, thin, and dry at each stage is the rule that carries into every later painting job.
2. Hang things securely on a stud
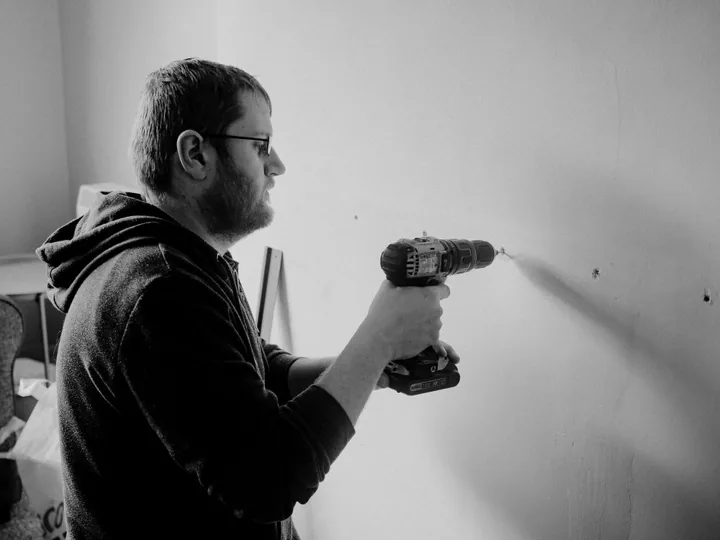
A stud finder, a tape measure, and a level turn hanging into a reliable job instead of a guess, and that is a core part of DIY basics for homeowners. Mark the stud, drill a pilot hole slightly smaller than the screw, drive the screw through the bracket, and check the level before you tighten fully. Heavy items need a stud or a proper wall anchor rated for the weight, never a bare nail in plain drywall.
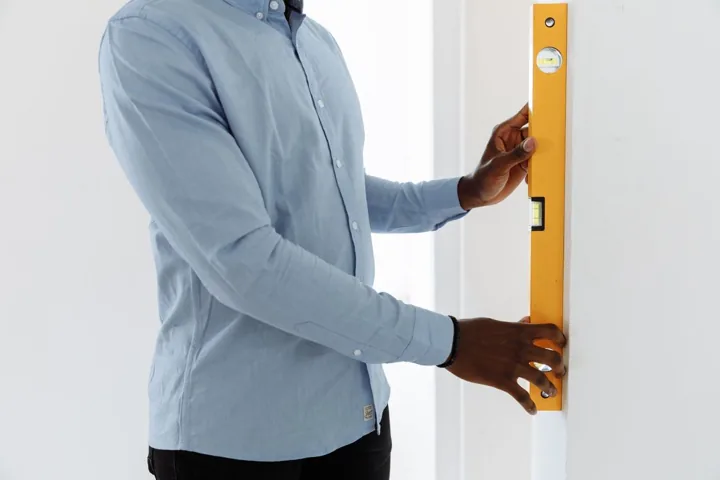
Measure twice from a fixed point, such as a corner or the floor, and mark with a light pencil line you can erase later. That habit prevents the most common beginner error, which is a shelf that looks fine from one angle and drifts visibly from the other. A level check at the end takes ten seconds and saves a second round of holes.
3. Stop a dripping faucet before it wastes water and money
Most dripping faucets start with a worn washer, a loose fitting, or mineral build up around the spout. Close the local shut off, plug the drain so small parts cannot fall in, and take a photo of the faucet parts in order before you remove anything. That photo is your map for putting the faucet back together in the right order.
Angi, in a guide updated in September 2026, puts the national average cost to fix a leaky faucet at $270, with most homeowners paying between $100 and $400. A simple washer or fitting fix at home costs far less in parts, which is why this skill pays for the starter toolkit quickly, and it shows DIY basics for homeowners at their best. If the faucet body is corroded, the threads are worn, or the drip returns within days, stop and get a plumber, because a damaged faucet body will not improve with more tightening.
4. Unclog a drain with a plunger before you reach for chemicals
A plunger, used with a firm seal and steady pressure, clears many slow sinks and tubs without chemicals or dismantling. Run enough water to cover the plunger cup, seal any overflow opening with a damp cloth, and push and pull in a steady rhythm for about twenty seconds. Lift slowly and check whether the water drains freely before you repeat.
Skip chemical drain cleaners for a first attempt, because they can damage pipes and splash back during later work, and that caution is a basic rule in DIY basics for homeowners. If several drains back up at once, if water rises in another fixture when you plunge one, or if the clog returns within a week, call a plumber, because the blockage may sit in the main line rather than in one trap.
5. Change filters and check the water heater setting
Two short routine jobs protect comfort and efficiency all year. Learning how to clean HVAC filters keeps air moving well, and a regular filter check is one of the simplest habits in any home maintenance checklist. Note the filter size on the old filter frame, slide the new filter in with the airflow arrow pointing the right way, and write the date on the frame so the next change is easy to judge.
For the water heater, find the temperature dial and check the setting, because many units ship set hotter than most homes need. The United States Department of Energy recommends 120 degrees Fahrenheit for most households, and notes that each 10 degree reduction can cut water heating costs by 3 percent to 5 percent. A cooler tank also slows mineral build up and lowers scald risk, which matters most in homes with young children or older adults.
6. Seal gaps with caulk where water and drafts enter
Caulk seals the small gaps around baths, sinks, windows, and baseboards where water and drafts creep in, and it is a useful material in any list of DIY basics for homeowners. Cut the nozzle tip small, practice a steady bead on cardboard first, and smooth the bead with a damp finger in one smooth pass. Remove old cracked caulk before you apply new caulk, because new sealant over loose old sealant will peel away quickly.
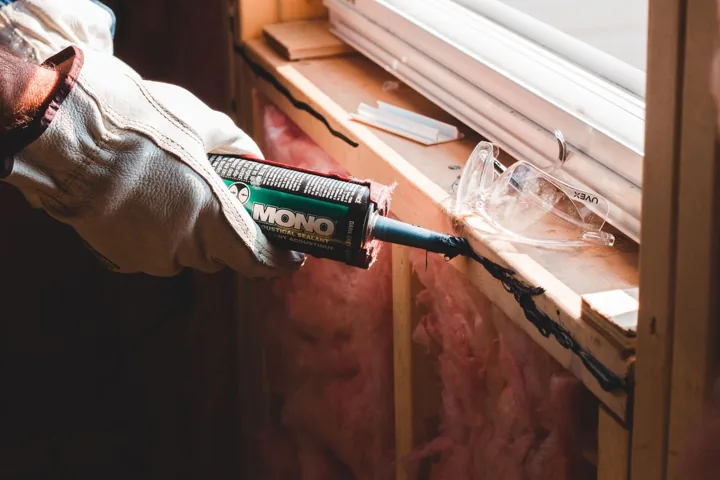
Choose the right product for the spot, since bath and kitchen caulk must handle moisture while exterior caulk must handle weather and movement. Read the label for cure time before you run water over a fresh bath seal, and keep the room ventilated while the product cures. A neat caulk line is a small job with an outsized effect on drafts, leaks, and mold.
7. Paint a room neatly, with preparation first
Good painting is mostly preparation, and it is a rewarding part of DIY basics for homeowners. Clean the walls, fill and sand small dents, tape edges and trim, cover floors and furniture, and stir the paint well before you open the room to a roller. Paint the ceiling first, then the walls, cutting in edges with a brush before you roll each section while the brushed edge is still wet.
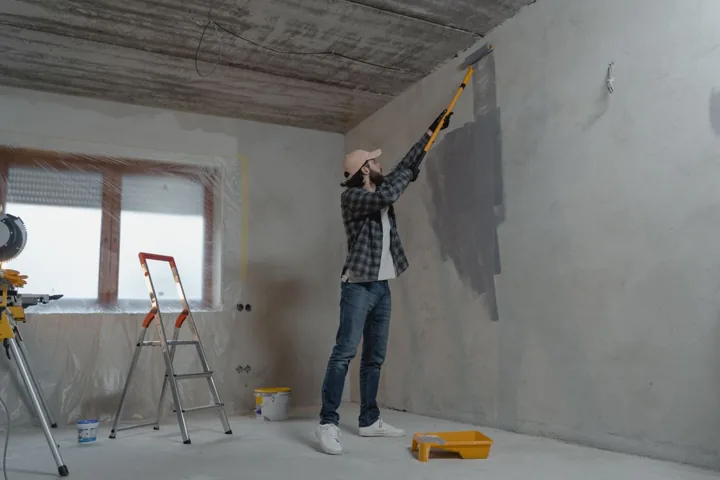
Two coats, with full drying time between them, give a deeper and more even finish than one heavy coat. Keep a wet edge as you roll, work in sections about three feet wide, and step back often to check for missed spots in natural light. Wash brushes and rollers promptly, because dried paint ruins good tools faster than any amount of use.
How long each skill takes, and the jobs that look easy and are not
Time is the part most DIY guides skip, and it is the part that decides whether a job fits in an evening. These are first time estimates for someone learning DIY basics for homeowners, with the tool in hand and the instructions open, and they come from the worked examples in HowTo Bookshelf, which times its own jobs the same way.
| Skill | First time |
|---|---|
| Patch a small wall hole and touch up paint | About 30 minutes, plus drying time |
| Hang things securely on a stud | About 30 minutes for a 40 pound mirror on two lag bolts |
| Stop a dripping faucet | About 30 to 45 minutes for a cartridge swap, about $15 for the part |
| Unclog a drain with a plunger | About 15 minutes |
| Change filters and check the water heater setting | About 15 minutes |
| Seal gaps with caulk | About 30 minutes a room |
| Paint a room neatly | A weekend, prep included |
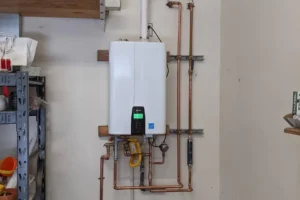
Then there are the jobs that look easy and are not. A water heater swap looks like plumbing and ends in gas, venting, permits, and a voided warranty.
Removing a wall looks like demolition and ends in structure, wiring, and permits. Regrouting a shower looks like a tube of grout and ends in a leak behind the tile, so learn to spot the jobs that grow, and the fix is to slow down and ask what the job can hide before you start it.
Replacing an outlet looks like three wires and ends in a live circuit if you cannot identify the shutoff. My rule, and the one HowTo Bookshelf prints, is: if the project needs a permit, a helper, or a shutoff you cannot identify, hire it out.
How Much DIY Saves, and When a Pro Is Cheaper
Small jobs are where DIY basics for homeowners save most, because labor is the largest part of the bill. Angi, in a guide updated in October 2026, puts the national average plumbing repair at $341, with most jobs landing between $182 and $501, and plumber labor rates typically running from $45 to $200 per hour. A beginner job that takes an hour of your own time, with parts costing a few dollars, clearly beats that bill when the job is safe and simple.
DIY stops saving money when a mistake creates water damage, a failed inspection, or a repeat visit to fix the first fix. Emergency plumbing rates run far higher than standard rates, and Angi notes emergency plumbers typically charge 1.5 times to 3 times the standard rate. That gap is the real cost of pushing past your skill level, and it is why the stopping points in this guide matter as much as the skills.
| Job type | DIY makes sense when | Call a pro when |
|---|---|---|
| Patching and painting | The area is small and the surface is sound | There is water damage, sagging, or mold behind the paint |
| Faucet and drain fixes | One fixture is affected and parts are simple | Several drains back up, or pipes leak inside a wall |
| Filters and settings | You can reach the filter and read the label | The system short cycles, smells of gas, or will not start |
| Hanging and sealing | The weight is known and the wall is solid | The wall is damaged, or the item is heavy and overhead |
Get two written quotes for any pro job, ask what the quote includes, and keep photos of the fault before work starts. A clear written scope protects both sides, and it gives you a record if the same fault returns. For a first home, that paper trail is as valuable as the repair itself.
A First Month Learning Plan
A first month plan works best when it is small enough to finish, which is the first rule of DIY basics for homeowners. Week one is learning your home: find every shut off, note filter sizes, and photograph the breaker panel labels, the water heater label, and the main water valve. Week two is one tool skill: tighten every loose handle and hinge you can reach, and patch one nail hole from start to finish.
Week three is one water skill and one air skill: practice the plunger method on a slow drain if you have one, and change or clean a filter on schedule. Week four is one visible finish: caulk one bath edge or paint one small wall section with full preparation. Four finished jobs in a month build more confidence than ten half started projects, and a starter trio of one shut off check, one tool skill, and one visible finish is enough for the first month, and that trio is the whole of diy basics for homeowners in practice.
Picture a first project in a 12 foot by 10 foot spare bedroom, where the only faults are two nail holes, one loose shelf bracket, and a door handle that wobbles. One Saturday morning covers all three: filler and a brush for the holes, a drill and a level for the bracket, and a screwdriver for the handle. That single morning teaches measuring, patching, drilling, and checking, and it leaves a room visibly better for the next guest who uses it.
First month checklist
- Find and label the main water shut off, the breaker panel, and the gas shut off if your home uses gas
- Note every filter size and write the next change date on the calendar
- Patch one nail hole fully, from filler to final coat, without rushing the drying time
- Hang one item on a stud and check it with a level before you load it
- Seal one gap with caulk and leave it undisturbed for the full cure time on the label
Safety note: this guide covers beginner jobs only. Switch power off before electrical work, shut water off before plumbing work, and never work on gas lines, main panels, or structural parts yourself. If a job feels uncertain, if you cannot find a shut off, or if damage is hidden inside a wall, stop and call a licensed pro before the job grows larger.
In 2017, the most recent year with published figures, ladders were involved in about 193,815 emergency room visits in the United States, according to United States Consumer Product Safety Commission emergency room data, and about 300 people die in ladder falls each year. That is why ladder setup belongs in any basic safety routine: check the feet, lock the spreaders, and never stand on the top rung.
Sources for this diy basics for homeowners guide: Angi, national average cost to fix a leaky faucet $270, most homeowners paying $100 to $400, guide updated September 2026; United States Department of Energy, set the water heater to 120 degrees Fahrenheit, and every 10 degree reduction can cut water heating costs by up to 5 percent; HowTo Bookshelf, practice on a $5 drywall offcut before you cut into a real wall. No links are given here, because the Angi faucet guide and the Department of Energy page could not be verified at a stable address.
Related guides
- The Ultimate Home Maintenance Checklist for 2027
- How to Clean HVAC Filters the Right Way in 2027
- When to Replace Water Heater: 7 Signs Your Tank Is Failing in 2027
- How to Use a Power Drill: A Beginner Guide for 2027
- Power Drill Safety Tips Every DIYer Should Know for 2027
- How to Choose a Power Drill for Home Projects in 2027
- Circular Saw Safety Tips Every DIYer Should Know for 2027
- How Much Does It Cost to Install a Ceiling Fan in 2027
- How Much Does a 20×20 Stamped Concrete Patio Cost in 2027
Frequently asked questions
Do I need experience before I start learning DIY basics for homeowners?
No experience is needed beyond patience and a willingness to start small. Choose one low risk job, such as tightening a handle or patching a nail hole, and complete it fully before you move to a larger job. Confidence grows from finished jobs, not from a large tool collection.
What tools should a beginner buy first?
Start with a tape measure, a claw hammer, two screwdrivers, an adjustable wrench, pliers, a small level, and safety glasses. Add a cordless drill and driver once you are comfortable measuring and marking, because drilling rewards good measuring and punishes guessing. Buy quality basics first and add specialty tools only when a real job calls for one.
When should I call a pro instead of doing a job myself?
Call a pro for gas work, main panel electrical work, structural changes, major plumbing inside walls, and any job that needs a permit. Also call a pro when several drains back up at once, when water appears inside a wall, or when a repair has already failed twice. A prompt pro visit is cheaper than water damage or a failed inspection.
How can I learn a new skill without damaging my home?
Practice on a low stakes spot first, such as a closet wall, a spare room, or a piece of scrap wood. Watch the full job once, read the product label, and set a stopping point before you start, so you know when to pause and ask for help. Photograph each stage, because photos make it easy to retrace steps if you need to undo a stage.
Is DIY always cheaper than hiring a pro?
DIY is usually cheaper for small, safe jobs where labor forms most of the bill, such as patching, sealing, and filter changes. Hiring a pro is cheaper when a mistake could cause water damage, void a warranty, or fail an inspection, because the second repair costs more than the first. Compare the full risk, not just the first quote, before you decide.