
Power Drill Safety Tips Every DIYer Should Know for 2027
Wear safety glasses that meet the ANSI Z87.1 standard, clamp the workpiece so it cannot spin, use a sharp bit made for the material, and keep loose clothing, hair, and jewelry away from the spinning bit. Those four habits are the core of power drill safety tips, and they matter because a drill feels friendly until a bit binds.
A power drill feels friendly because it is light, quiet compared with a saw, and easy to pick up. That friendly feel is also why beginners get hurt. Most injuries that power drill safety tips exist to prevent do not come from a rare defect.
They come from a rushed job, a loose workpiece, a dull bit, or a moment when the bit binds and the drill twists sharply in the hand.
This guide covers the full set of power drill safety tips a beginner needs, from gear and setup to grip, walls, batteries, and ladders. If you have not yet learned how to use a power drill, read that guide first for the parts and settings, then use this guide as the power drill safety tips checklist you run before every job.
Why Drill Safety Deserves Your Full Attention
Power drill safety tips matter because drilling throws chips, dust, and sometimes a broken bit tip at speed. A small chip in an eye can cause a serious injury, and that risk exists even on a job that takes less than a minute, while eye injuries are also common across all kinds of work, not only drilling, which is why safety glasses should feel as normal as putting on shoes before a job. A study released by the United States Consumer Product Safety Commission counted more than 2,500 people a year receiving hospital treatment for power drill injuries, and that is why power drill safety tips start with the eyes.
An eye injury prevention fact sheet from eLCOSH, drawing on United States Bureau of Labor Statistics data, reports that about 2,000 workers suffer eye injuries on the job each day in the United States, with more than $924 million in workers compensation and nearly $4 billion in wage and productivity losses. The same fact sheet reports that nearly three out of five injured workers were not wearing eye protection at the time, and that about 90 percent of workplace eye injuries are preventable with proper eyewear and safety measures, according to a Prevent Blindness America spokesperson, and those are workplace figures, not home DIY figures, so they show the scale of the risk, not your odds at home.
Those figures describe workplaces, not home DIY alone, but they show why power drill safety tips matter at home too. At home nobody hands you glasses or stops the job when you skip them. You have to build the habit yourself, and the habit has to cover every drilling job, including the quick one.
Other drill risks are less obvious. A bit can bind in wood or metal and twist the drill body hard enough to sprain a wrist. A drill can hit a hidden wire or pipe inside a wall.
A battery can be damaged by heat or by a wrong charger. A ladder job can turn a small slip into a fall. None of these needs a powerful drill.
A basic cordless drill can do all of them when the setup is wrong.
Wear the Right Gear Before the Drill Starts
Gear comes first in any list of power drill safety tips, before you mark a hole or fit a bit. Put it on, check the fit, and keep it on until the drill stops and the dust settles. The table below lists the gear that matters for ordinary home drilling and when each item earns its place.
| Gear | When to wear it | What to check |
|---|---|---|
| Safety glasses with side shields | Every drilling job, no exceptions | ANSI Z87.1 mark on the frame or lens, snug fit, no slipping |
| Sealed goggles | Overhead drilling, dusty demolition, masonry dust | Seal sits flat on the face, lens stays clear |
| Dust mask | Drilling masonry, plaster, or painted surfaces, or any dusty job | Mask fits the face, straps sit flat, nose clip shaped |
| Hearing protection | Hammer drilling, long sessions, masonry work | Plugs rolled and seated, or muffs fully over the ears |
| Sturdy closed shoes | Every job | Good grip, toes covered, laces tied |
| Work gloves for handling only | Carrying timber, handling rough boards, clearing debris after drilling | Gloves off before the bit spins |
Ordinary eyeglasses are not safety glasses. Tool manuals from DeWalt state this plainly, and they require ANSI Z87.1 eye protection for drill work. Everyday glasses can shatter, they lack side shields, and chips can slip in from the side.
If you wear prescription lenses, wear safety glasses made to your prescription, or wear sealed goggles over your regular glasses.
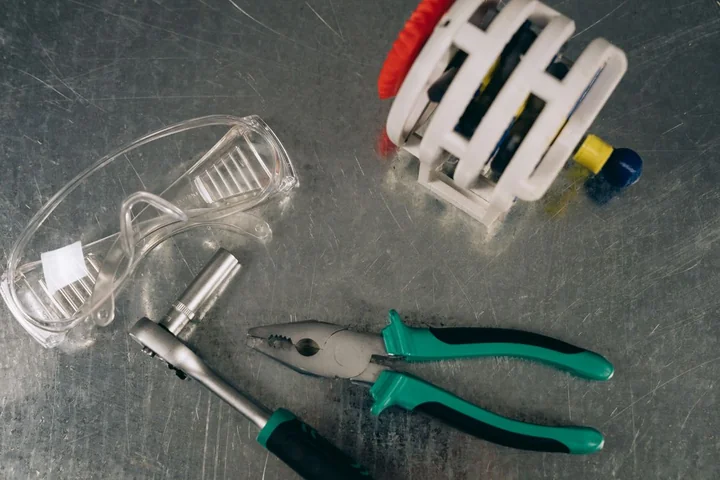
Choose glasses for open drilling and goggles for overhead work. When you drill above your head, dust and chips fall straight down toward your face, and glasses with open sides give particles a path in. Goggles seal that path.
A face shield adds a second layer for heavy debris, but it replaces neither glasses nor goggles underneath it.
Power drill safety tips give gloves a clear rule because they help in one moment and hurt in the next. Wear gloves to carry rough timber and to handle sharp offcuts. Take them off before you drill.
A glove can catch on a spinning bit and pull a hand toward it, and that risk is greater than the small comfort gloves give while drilling. Loose sleeves, dangling jewelry, and long hair snag just as fast. Tie hair back, roll sleeves up tight, and remove rings, bracelets, and necklaces before the drill runs.
Run This Ten Point Check Before Every Job
Run this checklist before every job. It is the fastest of all power drill safety tips to learn, two minutes that catch the faults behind most beginner injuries. It catches the faults that cause most beginner injuries, and it works for a shelf bracket, a curtain rod, or a garden fence board alike.
- Put on safety glasses and check the ANSI Z87.1 mark, then add a dust mask and hearing protection when the job calls for them.
- Tie back hair, remove jewellery, roll up loose sleeves, and take off gloves before the bit spins.
- Inspect the drill body, cord, chuck, and battery for cracks, damage, or swelling, and do not use a tool that looks damaged.
- Fit a sharp bit made for the material, seat it straight in the chuck, tighten the chuck firmly, and tug the bit gently to check the grip.
- Set the drill to lock or remove the battery before you change a bit, adjust a setting, or clear debris from a hole.
- Clamp the workpiece to a stable surface, or hold it firmly against a solid support, and never hold a small piece in one hand while drilling with the other.
- Check what sits behind the surface, including wires, pipes, and studs, and stop when you cannot confirm a safe spot.
- Mark the hole, dent the mark so the bit cannot wander, and start slowly until the bit bites into the surface.
- Keep both feet flat, your body balanced, and the drill in line with the hole, and never overreach or lean off a ladder to gain a few inches.
- Put the drill down on its side on a stable surface when you pause, with the lock engaged, and keep it away from children and pets.
Two checks on that list deserve extra stress because beginners skip them most. The first is the bit check. A bent or dull bit wanders, overheats, and binds far more than a sharp one.
The second is the lock check. Battery drills stay live even when unplugged from the wall, so a trigger caught in a toolbox or a bag can start the drill by accident. Set the forward and reverse switch to its middle lock position whenever you carry the drill, change a bit, or put it down.
Hold the Drill So a Bind Cannot Hurt You
Kickback in a drill is not like kickback in a saw, but it can still twist hard. When a bit binds in dense wood, a knot, or metal, the drill body tries to rotate around the stuck bit. Your wrist takes that twist if your grip is weak, your stance is off balance, or you are reaching too far.
Power drill safety tips on grip start here: hold the drill firmly with both hands where you can, one hand on the grip and one steadying the body or the auxiliary handle when your drill has one. Tool manuals from Ryobi and DeWalt both stress the auxiliary handle point: when a handle is supplied, use it, because loss of control causes personal injury. Keep your wrist straight and your arm in line behind the drill, so a sudden twist travels into your arm rather than bending your wrist sideways.
Start slowly and let the bit cut. More pressure on the drill does not make the hole come any quicker. It overheats the bit, dulls the edge, and raises the chance of a bind.
When a bit binds, release the trigger at once. Do not fight the twist, do not start and stop the drill to free it, and do not yank the drill sideways. Set the switch to reverse, back the bit out slowly, clear the debris from the hole, and start again with less pressure and a sharper bit.
Keep the drill straight and your body balanced through the whole hole. A drill held at an angle binds more easily, and a body leaning off balance cannot absorb a twist. Stand with both feet flat, knees soft, and weight even.
If you cannot reach a hole while standing balanced, move the work, move the ladder, or change your position. Never stretch to save a minute of setup.

Clamp the Work and Never Drill in Your Hand
One of the core power drill safety tips from the Canadian Centre for Occupational Health and Safety drill guidance gives a rule every beginner should memorize: never drill with one hand while holding the material with the other, and clamp small stock securely so it cannot twist or spin. A loose board can spin with the bit and strike a hand, an arm, or a leg. A small offcut can spin fast enough to cut skin before you can react.
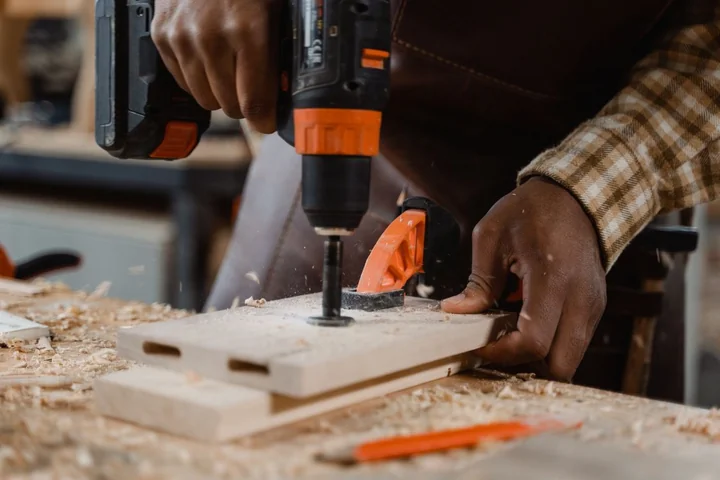
Clamp the board to a bench, a sawhorse, or a stable table. Put a scrap board underneath when you drill through, so the bit exits into scrap instead of your bench or your floor. When the piece is too large to clamp, brace it firmly against a solid surface and keep both hands on the drill.
When the piece is too small to clamp safely, find a larger board to clamp it to, or use a different method. A hand held piece is never the safe option, even for one quick hole.
Clear the area around the work before you start. Move cords out of the cutting path, keep the floor free of offcuts and tools you could trip on, and keep bystanders, children, and pets out of the drilling zone. Chips travel further than most beginners expect, and a bystander without glasses faces the same eye risk you do.
When someone else is in the room, they need eye protection too, or they need to step out until the drilling stops.
Match the Bit, the Speed, and the Pressure to the Material
Bit choice is one of the most practical power drill safety tips, not only a quality choice. A twist bit suits wood, plastic, and thin metal. A spade bit cuts wide holes in wood.
A masonry bit, with a hammer setting when your drill has one, suits brick, block, and concrete. A driver bit must match the screw head exactly, or it slips, strips the head, and can jump toward a hand.
Use a sharp bit and replace worn bits promptly. The Canadian Centre for Occupational Health and Safety guidance lists sharp bits and clear air vents among its core drill rules, because a dull bit needs more force, creates more heat, and binds more often. Check a bit before each job.
If the cutting edge looks chipped, the bit wobbles in the chuck, or the bit is bent, retire it. A cheap bit is never worth a ruined workpiece or an injury.
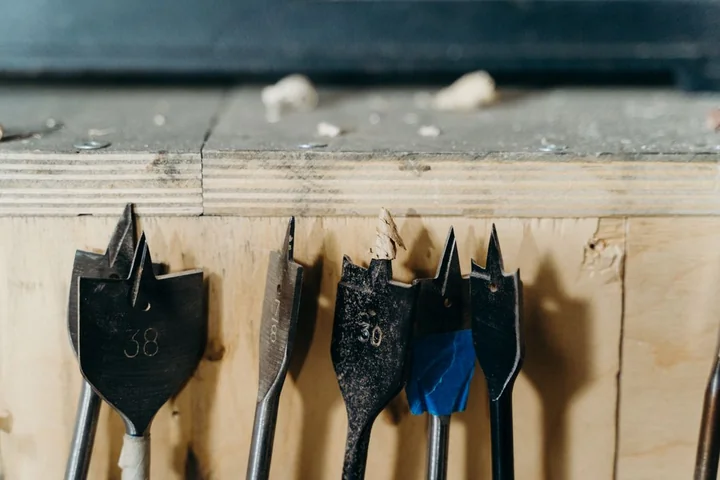
Set low speed for driving screws and for large bits, and high speed for small drilling jobs, following your own drill manual for its exact ranges. Ease off pressure just before the bit breaks through the far side of a board. That last moment is when the bit often grabs, the drill twists, and splinters blow out the back.
Light pressure, a scrap board behind the work, and a slow finish prevent most of that trouble.
For metal, mark the spot with a firm dent, start very slowly, and add a drop of cutting oil when you have it, so the bit stays cool and sharp. For masonry, keep the drill straight, clear dust from the hole often, and wear hearing protection and a dust mask. Dust from masonry and from some painted surfaces can harm lungs, so a mask is not optional decoration on those jobs.
When you do not know what a painted surface contains, especially in an older home, stop and check before you drill into it.
Check Walls for Wires, Pipes, and Studs First
Walls hide wires, pipes, and gas lines, and a drill cannot tell the difference between drywall and a live cable. That is the first of the power drill safety tips that saves a house, not just a finger, and tool manuals warn drill users to hold the tool by its insulated gripping surfaces when a bit may contact hidden wiring, because a live wire can make exposed metal parts of the tool live and give the operator an electric shock, and that warning exists because the accident is real and it happens fast.
Use a stud finder that also detects live wires where you can, and learn its signals before you trust it on a real wall. Mark studs, mark any wire warning, and drill only where you feel confident. Avoid the zones directly above, below, and beside outlets and switches, where cables commonly run.
Avoid drilling blind into a wall cavity when you cannot see or scan what sits behind it.
Stop and call a pro when you suspect a wire or a pipe and you cannot confirm a safe spot, when a wall feels soft or damp, or when a previous repair in the same area already failed. Paying for a pro visit now costs less than water damage, a failed inspection, or an injury. The same judgement applies to gas lines, main electrical panel work, and structural changes.
A drill is a wonderful tool for shelves, brackets, and small repairs. It is not the right tool for every job in a home.
Electricity rules: GFCI, grounding, and a damaged tool
Cords are where drill safety turns into electrical safety, and the rules here come from the Occupational Safety and Health Administration, not from habit, which is why power drill safety tips on electricity start with the outlet, not the tool. A ground fault circuit interrupter, or GFCI, cuts the power in a fraction of a second when current leaks where it should not, and OSHA requires GFCI protection for 120 volt, single phase, 15 and 20 amp receptacles that are not part of the permanent wiring, under 29 CFR 1926.404(b)(1), so at home, plug a corded drill into a GFCI outlet, or a portable GFCI, whenever you work outside or near water, and press the test button before you start. That test takes ten seconds, and of all the power drill safety tips, it is the one that costs the least and saves the most, following the OSHA power tools eTool.
Never remove or modify the grounding prong on a plug, and never defeat it with an adapter. A corded drill is either grounded through that third prong or double insulated, and the prong is the ground path, and it is the part of a drill that power drill safety tips protect first, so check it before every job. If the prong is missing, bent, or loose, the tool is not safe to use, and the same rule covers the cord: inspect it before each job, and a cut, crushed, or melted cord means the drill stays on the shelf.
A damaged drill goes out of service and gets tagged, not back in the cupboard for later, and that is the rule power drill safety tips repeat most often, and the one most home workshops ignore. OSHA practice is to remove damaged or defective tools from service and tag them so nobody picks them up by mistake, and that tag stays on until the tool is repaired or replaced, because a drill that smells of burning, has a cracked housing, a wobbling chuck, or a trigger that sticks is a damaged drill, and no job is urgent enough to use it anyway.
Cords, Batteries, and Wet Areas Need Their Own Rules
Corded drills carry two risks that cordless drills do not, and every list of power drill safety tips puts them first: a damaged cord and a trip hazard. Inspect the cord before each job for cuts, frays, and loose connections at the plug and the housing. Keep the cord behind you and clear of the cutting area, as the Canadian Centre for Occupational Health and Safety guidance directs.
Never carry a drill by its cord, never yank a plug out by the cord, and never use a corded drill in a wet or muddy spot, because water and mains power together turn a small fault into a shock risk. Keep cords away from heat, oil, and sharp edges, and disconnect the tool when it is not in use, before servicing it, and when changing accessories, and never hold your fingers on the switch while carrying a plugged in tool, following the OSHA power tools eTool.
Power drill safety tips for batteries add a different set of rules. Charge only with the charger specified for that battery, and use only the battery pack designated for your tool. Manuals from DeWalt and Ryobi both warn that a wrong charger or a wrong battery pack can create a risk of fire or injury.
Keep a battery clear of keys, coins, nails, and screws when it is out of the tool, because metal across the terminals can short the pack.
Do not charge or store a battery where heat can build up. DeWalt battery guidance warns against storing or using a battery pack where temperature may reach or exceed 104 degrees Fahrenheit, such as a hot shed in summer. Do not use a battery that is cracked, swollen, leaking, or hot to the touch.
If liquid from a battery contacts skin, flush with water, and seek medical help at once if it contacts eyes. Store batteries at room temperature, keep them out of reach of children, and never tape a trigger in the on position.
Ladders, Overhead Work, and Tired Hands
Drilling from a ladder changes every risk at once, and power drill safety tips for ladders come down to one rule: never drill with one hand while you hold on with the other. Your balance is worse, your grip is weaker, and a twist that would be a nuisance on the ground can throw you off balance. Use a stable ladder on level ground, keep both feet on the rungs, and keep your body centred between the rails.
Never lean sideways to reach a hole, never stand on the top step or a paint shelf, and never hold the drill in one hand while gripping the ladder with the other when a better setup exists.
For overhead work, add sealed goggles, a dust mask, and a hat or a hard hat when debris could fall. Plan the job so you drill as little as possible overhead, and move the work down to bench height when you can. A shelf bracket drilled at bench height, then fixed in place, beats the same bracket drilled overhead with dust falling into your eyes and your neck aching.
Do not drill when you are tired, rushed, or unwell. Tool manuals state this as a general safety warning, and it matters most for beginners. A moment of inattention while operating a power tool can cause serious injury, and fatigue makes that moment far more likely.
If a job is running long, if your hands feel tired, or if you catch yourself rushing, stop. Put the drill down locked, step back, and finish the job after a break. A job done tomorrow beats a job done with an injury today.
A Safe Shelf Job, Worked Through Hole by Hole
A shelf job shows how these power drill safety tips fit together. Imagine fitting a 36 inch long floating shelf in a 10 foot by 12 foot bedroom, held by two brackets fixed into wall studs. The shelf itself is simple.
Beginners usually go wrong on the safety work around the cut, so walk through it slowly.
Begin with the gear and the checks, and only then mark a line. Put on ANSI Z87.1 safety glasses, tie back hair, remove jewellery, and inspect the drill, the bit, and the battery. Find the studs with a stud finder that also detects live wires.
Most homes frame studs 16 inches apart, so finding one tells you where the next one sits. Mark both stud centres, then mark each bracket hole position, and confirm no wire warning appears at any mark. If a warning appears, move the shelf or call a pro.
Do not drill through a warning to save a measuring step.
Clamp nothing here, because the wall is the work, but set your stance before the first hole. Stand flat footed, face the wall squarely, and hold the drill with both hands, one on the grip and one steadying the body. Dent each mark lightly so the bit cannot wander, start slowly until the bit bites, then drill with light, steady pressure.
Ease off near the end of each hole so the bit does not grab as it breaks through the drywall.
Between holes, set the drill down locked on a stable surface, never balanced on a ladder rung or a chair seat. After the last hole, check each bracket by hand for wobble before you load the shelf. A bracket that wobbles needs a fix now, not after books sit on it.
This single job uses every rule in this guide: glasses, hair and jewellery, bit check, wall check, stance, slow start, light pressure, and a locked drill between holes. That is the point. Safety is not a separate chapter.
It is the way you do each hole.
Mistakes That Cause Most Drill Injuries
The mistakes below are the ones beginners tend to make, and each one maps to a simple fix, and that is the practical half of this guide, and the half most people skip. The table below names the mistake, the risk behind it, and the fix to use next time, so keep it beside the checklist until the fixes feel automatic.
| Mistake | Risk | Fix |
|---|---|---|
| Skipping safety glasses for a quick hole | Chip or dust in an eye | Glasses on before the drill runs, every time |
| Drilling a board held in one hand | Board spins and cuts a hand | Clamp the board to a bench every time |
| Using a dull or bent bit | Bit wanders, overheats, and binds | Retire worn bits and fit a sharp bit made for the material |
| Wearing gloves while the bit spins | Glove catches and pulls a hand in | Gloves for handling only, bare hands for drilling |
| Drilling a wall without a wire check | Electric shock or a burst pipe | Scan for wires, avoid outlet zones, stop when unsure |
| Pushing hard to drill faster | Bit binds and the drill twists | Light pressure, sharp bit, slow finish through the far side |
| Changing a bit with the battery fitted | Trigger starts the drill by accident | Lock the switch or remove the battery first |
| Drilling off balance on a ladder | Fall from a twist or a slip | Move the ladder, centre your body, never overreach |
One more habit prevents a whole class of accidents: practice the exact job on scrap first. A test hole tells you the bit size, the speed, and the feel of the material before the real workpiece is at risk. Scrap practice also gives you a safe place to learn how a bind feels, with no shelf, no wall, and no ladder involved.
It takes a minute, and it is the cheapest insurance in any DIY job.
Storage, Children, and After the Job
The job does not end when the last screw sits flush, and power drill safety tips for storage are the dull part that keeps the next job safe. Remove the bit, lock the switch, and wipe dust from the vents and the chuck so the next job starts clean. Store the drill on its side on a stable surface, or hung where it cannot fall, with the battery removed when the tool will sit unused for a long time.
Keep the drill, bits, and batteries out of reach of children, and never let a person unfamiliar with the tool use it unsupervised.
Add drill checks to your home maintenance checklist so the tool stays ready and safe between jobs. A quick check each season covers the battery charge, the chuck grip, the cord condition, and the state of your safety glasses. Scratched or loose glasses protect far less than they appear to, so replace them when the lens clouds or the frame no longer sits snug.
Keep a simple first aid kit near your work area, and know where it sits before you start, because a small cut from a sharp offcut, a splinter, or dust in an eye needs fast, calm treatment, not a search through cupboards. When an eye injury happens, do not rub the eye.
Wash the eye gently with clean water where that is right, cover it lightly, and get medical help promptly when pain, vision change, or a foreign object is involved.
When to Stop and Call a Pro
Knowing when to stop is the last of the power drill safety tips, and it is the one that saves the most money, and if you drop the drill, stop and inspect it before you use it again, because a dropped drill can hide a cracked housing or a bent chuck. Leave gas lines, main electrical panel work, structural changes, and major plumbing inside walls to a licensed pro. Call a pro too when you suspect wires or pipes behind a wall and you cannot confirm a safe spot, when a wall feels soft or damp, when a repair has already failed twice, or when a drill smells of burning, a battery feels very hot, a chuck wobbles, or a trigger sticks.
When a tool starts acting up, it is telling you something, and ignoring it risks the tool and the job.
Judge your own state the same way. If you feel dizzy, tired, or rushed, stop, and if the light is poor, improve it or wait for daylight.
If a job needs two people to hold a board steady, wait for the second person. No shelf, curtain rod, or bracket is worth a fall, a shock, or an eye injury.
One last warning, and it belongs in any list of power drill safety tips: a drill spins fast, throws debris, and can twist sharply when a bit binds. Hold the drill firmly, keep your body balanced, keep loose clothing, hair, and jewelry away from the bit, and never reach across a spinning bit. If the bit binds, stop the trigger at once, flip the switch to reverse, and ease the bit out slowly instead of forcing it free.
This guide gives general safety information for home DIY. It does not replace your drill manual, and for gas, electrical, structural, or major plumbing work, a licensed pro is the safe choice.
Sources for these power drill safety tips: OSHA power tools eTool, GFCI protection, cord rules, and damaged tool tagging; Canadian Centre for Occupational Health and Safety powered hand tools guidance; eLCOSH eye injury prevention fact sheet, about 2,000 eye injuries a day, $924 million and nearly $4 billion in losses; Prevent Blindness America, about 90 percent of workplace eye injuries preventable; United States Consumer Product Safety Commission, more than 2,500 people a year receive hospital treatment for power drill injuries. All four links open the publisher guides directly.
Related guides
- How to Use a Power Drill: A Beginner Guide for 2027
- DIY Basics for Homeowners: Essential Skills to Learn in 2027
- The Ultimate Home Maintenance Checklist for 2027
- How to Choose a Power Drill for Home Projects in 2027
- Circular Saw Safety Tips Every DIYer Should Know for 2027
- What Is Never to Be Engaged When Using Power Tools in 2027
Frequently Asked Questions
Do I really need safety glasses for one quick hole?
Yes, because a single hole can throw a chip or dust into an eye in less than a second. Safety glasses with side shields that meet the ANSI Z87.1 standard take seconds to put on, and they protect against the exact risk a quick job creates.
Should I wear gloves while using a power drill?
No, not while the bit spins, because a glove can catch on the rotating bit and pull your hand toward it. Wear gloves to carry timber and handle rough boards, then take them off before you drill, and keep sleeves tight and hair tied back.
What should I do when the drill bit binds in the wood?
Release the trigger at once and let the drill stop, then set the switch to reverse and back the bit out slowly. Clear debris from the hole, check that the bit is sharp and straight, and start again with less pressure instead of forcing the drill free.
How do I avoid drilling into a wire or a pipe?
Use a stud finder that also detects live wires, avoid the zones directly above, below, and beside outlets and switches, and drill only where you feel confident about what sits behind the surface. When you cannot confirm a safe spot, stop and call a pro rather than drilling blind.
Can I drill overhead safely as a beginner?
You can, but power drill safety tips for overhead work need sealed goggles instead of open glasses, plus a dust mask, because dust and chips fall straight toward your face. Keep the job short, keep your stance balanced, and move the work to bench height when that option exists.
How should I store a cordless drill and its battery?
Remove the bit, lock the switch, and store the drill on its side on a stable surface out of reach of children. Keep the battery at room temperature, away from metal objects and heat, and charge it only with its specified charger.