How to Use a Power Drill: A Beginner Guide for 2027
Start slow, learn the clutch and speed controls, practice on scrap wood first, and always wear eye protection before you pull the trigger. That is how to use a power drill safely on a first job, and a pilot hole in scrap first keeps a first shelf straight.
A drill earns its place because it does two jobs every homeowner needs: clean holes and screws driven flush. One cordless drill can handle most small jobs around a home, and it drills clean holes and drives screws far faster than a hand screwdriver.
This guide explains how to use a power drill, the parts, the settings, the bits, and the safety habits in plain terms, so your first project ends with a straight hole and a screw sitting flush, not a stripped head and a split board.
What a Power Drill Actually Does
If you are learning how to use a power drill, start with the tool most homeowners own. Most home drills are drill drivers. They do two jobs with one tool.
With a drill bit fitted, they cut holes in wood, metal, plastic, and masonry when you use the right bit for the material. With a driver bit fitted, they drive screws in and back them out again.
That second job is where beginners save the most time. Assembling flat pack furniture, fitting a shelf bracket, or fixing a loose hinge all go faster with a driver bit than with a hand screwdriver. The drill also gives you control a hand tool cannot match, because the clutch stops the screw at the depth you set instead of letting you force it past flush.
A drill driver is not the same as an impact driver, even though the two look alike in a store. An impact driver adds short bursts of extra twisting force when it meets resistance, which helps with long screws in dense wood. It is louder, harder to control for fine work, and not the best first tool.
Start with a drill driver, and add an impact driver later only when you regularly drive long screws.
Corded drills plug into an outlet and run without stopping, which suits long or heavy work. Cordless drills run on a rechargeable battery pack, so you can work anywhere without a cord in the way. Most beginners should start cordless, because the freedom matters more than endless run time for small home jobs.
Keep a spare battery charged if you can, a tip the Anika’s DIY Life drill guide stresses, so a flat battery never stops a job halfway through.
Know the Parts Before You Start
Once you know these parts, learning how to use a power drill gets much easier, because every setting on the tool has one clear job. You do not need to memorise a diagram. You only need to recognise five controls and know when each one matters.
The chuck is the clamp at the front that grips the bit. Most modern drills have a keyless chuck, which you open and close by hand. Twist the front sleeve one way to open the jaws, slide the bit in straight, then twist the other way until the bit feels firmly gripped.
Give the bit a gentle tug before you start, because a loose bit makes learning how to use a power drill frustrating and unsafe. If it moves, tighten again.
The clutch is the numbered ring just behind the chuck. It limits how much twisting force the drill applies before it starts to click and stop turning. Low numbers mean low force, which suits small screws and soft wood.
High numbers mean high force, which suits larger screws and hard materials. Larger bit, slower speed, because a big bit needs torque more than spin, and that rule is the one to remember when you learn how to use a power drill on thick stock. The drill symbol past the highest number switches the clutch off, and knowing that symbol is a small but important part of learning how to use a power drill, so the drill gives full power for drilling holes.
The speed switch sits on top of the drill on most models. Position 1 is low speed with high twisting force, and position 2 is high speed with less force. Use low speed for driving screws and high speed for drilling holes.
Never change this switch while the bit is turning, because you can damage the gears inside.
The trigger is a variable speed control, not a simple on and off switch. A light squeeze turns the bit slowly, and a firm squeeze turns it fast, which is why trigger control matters so much when you learn how to use a power drill. Start every hole and every screw slowly, let the bit bite into the surface, then build up speed smoothly.
Full speed from the first touch is the fastest way to wander off your mark or strip a screw head.
The forward and reverse switch sits just above the trigger. Forward turns the bit clockwise to drill in and drive screws in. Reverse turns it counterclockwise to back screws out or free a stuck bit.
The middle position locks the trigger, which is a safety feature. Set it to lock whenever you change a bit, carry the drill, or put it down.
The parts, labeled, and two first drills worth buying
Read this table with the drill in your hand, because learning how to use a power drill is mostly learning these seven parts by sight. Each part does one job, and knowing them by sight is faster than memorizing a diagram.
| Part | Where it sits | What it does |
|---|---|---|
| Chuck | Front of the drill | Clamps the bit, keyless on most modern drills, twist the sleeve by hand |
| Clutch, or torque ring | Numbered ring behind the chuck | Limits twisting force, low numbers for small screws, high numbers for large ones, drill symbol switches it off |
| Trigger | Under your index finger | Controls speed, squeeze gently for slow starts |
| Reverse switch | Above the trigger | Switches between drilling in and backing a screw out |
| Gear selector | Top of the drill | Low gear for torque, high gear for speed |
| Battery and release button | Base of the handle | Powers the drill, slides out for charging |
| LED work light | Above the battery, under the chuck | Lights the spot you are drilling |
Two first drills are worth your money for anyone learning how to use a power drill, and both prices were checked in November 2026, when this guide was written. The DeWalt 20V MAX compact drill driver kit, model DCD771C2, was $119 on Amazon on 5 November 2026, with two compact batteries, a charger, and a bag, and it is the drill most DeWalt households start with. The Ryobi 18V ONE+ HP brushless compact kit was $99 at Home Depot in late October 2026, with a 4Ah battery and charger, and it buys into the widest battery platform of the two.
Either one hangs a shelf, builds flat pack furniture, and drills clean holes in wood, and neither one needs a hammer mode for a first home drill. Prices move with sales, so check the current price before you buy, and buy the kit, not the bare tool, unless you already own the batteries. Figures: Pickstead, DeWalt DCD771C2 review, price checked 5 November 2026; Home Depot listing via this site, late October 2026.
Pick the Right Bit for the Job
When you learn how to use a power drill, bit choice comes right after safety. Bits are not interchangeable, and the wrong bit makes even a good drill perform badly. Twist bits are the general purpose choice for wood, plastic, and thin metal.
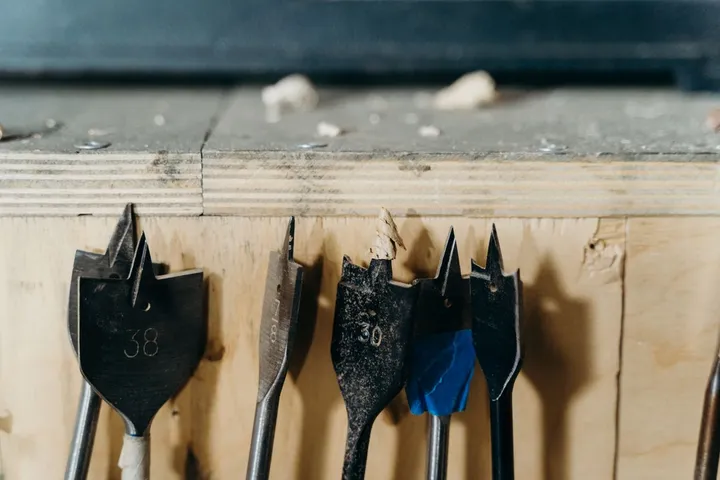
Spade bits cut wide, flat bottomed holes in wood, such as the hole for a door lock. Masonry bits have a hard tip for brick, block, and concrete, and they need a hammer drill setting if your drill has one. Driver bits match screw heads: Phillips bits fit cross shaped heads, flat head bits fit single slot heads, and square and star bits fit their own matching heads.
Match the driver bit to the screw head exactly. A loose bit slips out of the head under force, a problem called cam out, and it chews up the screw head so you cannot drive it or remove it cleanly. If the bit wobbles in the head, stop and try the next size up or down until it seats snugly with no play.
For most screws in wood, drill a pilot hole first. A pilot hole is a small guide hole slightly thinner than the solid shank of the screw, so the threads still grip the wood around it. It stops the wood from splitting, keeps the screw on line, and makes driving far easier, especially near the end of a board.
A guide from DiffSense puts the rule simply: hold the screw behind the bit, and you should still see the screw threads sticking out past the sides of the bit.
Size the bit by testing on scrap wood. Drill a pilot hole, drive the screw, and check the result. If the wood splits, the pilot hole was too small.
If the screw spins without gripping, the pilot hole was too large. One test on scrap saves a ruined workpiece, and it takes less than a minute.
Safety Habits That Prevent Most Injuries
Good habits matter more than speed when you are learning how to use a power drill, because most drill injuries come from rushing, not from the tool itself. Build these habits into every job, even a quick one, and they soon feel automatic.
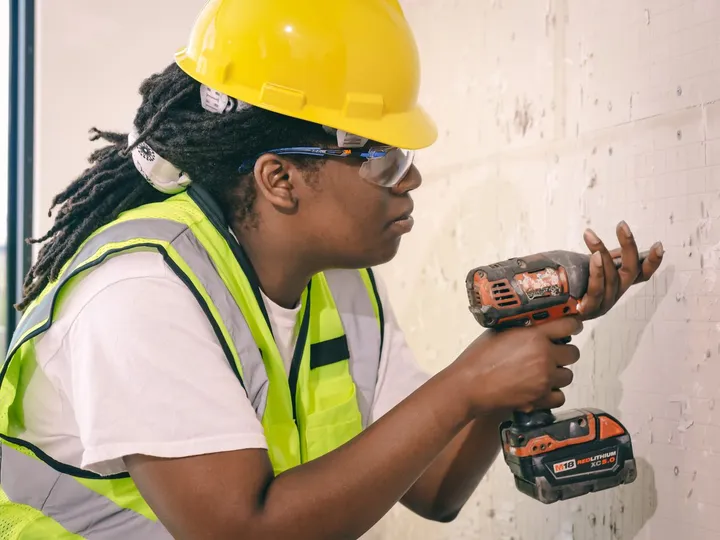
Wear safety glasses every time the drill runs. Drilling throws dust and small chips at surprising speed, and a single chip in an eye can end a project and cause a real injury. The Home Depot drill guide makes the same point plainly: eye protection is necessary when operating a drill, and loose clothing, long hair, and jewellery should stay clear of the spinning bit.
Keep your hands bare near the spinning bit. A glove can catch on a rotating bit and pull your hand in, which is why the Anika’s DIY Life guide warns beginners never to wear gloves when using a drill. Wear gloves for carrying timber and handling rough materials, then take them off before you drill.
Clamp the workpiece or hold it firmly against a solid surface. Never hold a small piece in one hand while you drill with the other, because the bit can grab and spin the piece. Put a piece of scrap wood under the workpiece when you drill through it, so the bit exits into scrap instead of your bench or your floor.
Check what sits behind the surface before you drill into a wall. Wires and pipes hide inside walls, and drilling into one turns a shelf job into an emergency repair. Use a stud finder that also detects live wires where you can, and stop if you are unsure.
If you cannot confirm that a spot is safe, find out first or call a pro.
Read the manual for your own drill before the first job. Controls sit in slightly different places on different brands, and the manual shows the exact battery release, the lock position, and the hammer setting if your model has one. Five minutes with the manual prevents most beginner confusion.
Drill Your First Hole, Step by Step
Pick a low stakes first job for the first time you learn how to use a power drill in practice. A piece of scrap pine board on a bench is perfect, because mistakes there cost nothing and teach you how the drill feels. Follow these steps in order, and do not skip the slow start.
- Mark the spot with a pencil cross, then press the tip of the bit into the mark to make a small dent so the bit cannot wander.
- Fit the right bit, tighten the chuck, and set the clutch to the drill symbol so the clutch cannot slip mid hole.
- Set the speed switch to position 2 for drilling, and check that the forward and reverse switch is set to forward.
- Hold the drill straight, at a right angle to the surface, with both hands where you can, one on the grip and one steadying the body.
- Squeeze the trigger gently until the bit bites, then increase speed smoothly with steady, light pressure and let the bit cut. Squeeze the trigger slowly ten times on scrap before your first real hole, and you will feel where the speed starts to bite, which is the fastest way to learn how to use a power drill trigger.
- Keep the drill straight all the way through, ease off the pressure near the end, and pull the bit out while it still spins slowly to clear the dust.
Straightness matters more than force. If you lean, the hole goes in crooked and the screw follows the same crooked path. Stand so your arm lines up behind the drill, look at the bit from two angles if you can, and let the tool do the cutting.
Leaning on the drill does not make the hole come any quicker. It overheats the bit, dulls the cutting edge, and risks snapping a small bit in the hole.
For metal, add one extra step: mark the spot with a centre punch or a firm dent, start very slowly, and add a drop of cutting oil on the spot if you have it. Engineer Fix notes that a little cutting oil keeps the bit cool and sharp and gives a cleaner hole. For masonry, use a masonry bit, keep the drill straight, and clear dust from the hole often so the bit does not bind.
Drive Screws Without Stripping Them
Driving screws is where beginners learning how to use a power drill lose confidence, because a stripped screw head feels like a disaster. It is not. It is almost always a settings problem, and the clutch exists to solve it.
Set the speed switch to position 1, fit the matching driver bit, and start with a low clutch number.
Here are the clutch settings to start from, in one place.
| Material | Clutch setting |
|---|---|
| Soft materials, pine and drywall | 4 to 8 |
| Hardwoods and metal | 12 to 18 |
| Small screw in soft material | 3 to 6 |
| Large lag screw in dense hardwood | Above 15 |
EngineerFix gives a useful starting range: a clutch setting around 4 to 8 suits soft materials such as pine and drywall, while a setting around 12 to 18 suits hardwoods and metal. House Tipster adds that most drills offer clutch numbers from 1 to 10 or 1 to 20, so your own dial may run higher or lower than these examples. The method stays the same whatever your dial shows.
Drive a test screw into scrap first. If the clutch clicks and the screw stops before it sits flush, raise the clutch by one or two numbers and try again. If the screw sinks past flush or the head strips, lower the clutch.
Repeat until the screw stops exactly flush with the surface. That test takes a minute, and it saves every screw in the real job.
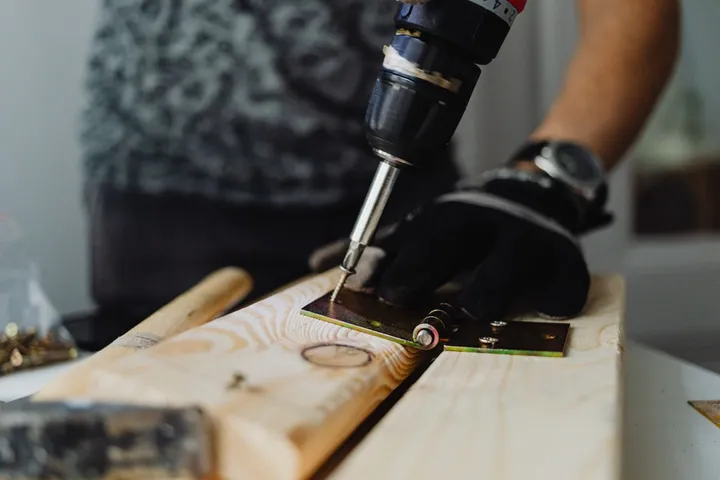
Keep firm, straight pressure on the back of the drill while you drive. The bit must stay seated in the screw head, because a bit that lifts out under power is what strips heads. Keep the drill in line with the screw, not at an angle, and stop the moment the screw sits flush.
That steady pressure is a core skill when you learn how to use a power drill for driving. Driving further only buries the head, splits the wood, or strips the head for no benefit.
If a screw does strip, stop at once. Try a larger bit size for grip, or use reverse with steady pressure to back it out. If neither works, use pliers on a raised head, or a screw extractor set from a hardware store.
Do not keep spinning a stripped head in hope, because it only gets worse.
A First Project: Hang a Shelf That Stays Up
Here is a concrete first project for anyone learning how to use a power drill that uses everything above: a 48 inch wooden shelf in a 12 foot by 10 foot spare bedroom, held by two brackets fixed into wall studs. It is a real job with a visible result, and it teaches measuring, pilot holes, and driving in one short session.
Start by finding the studs with a stud finder. Studs in most homes sit 16 inches apart, so once you find one, the next usually sits 16 inches to either side. Mark both stud centres with a pencil, hold the shelf level across the marks, and mark the bracket screw positions through the bracket holes.
Drill a pilot hole at each mark, slightly thinner than the shank of your 2.5 inch wood screws. Set the clutch low, drive a test screw into scrap first, then drive each bracket screw until it sits flush and the bracket feels solid with no wobble. Set the shelf on the brackets, check it with a spirit level, and tighten any screw that still allows movement.
If no stud sits where you need the shelf, use wall anchors rated for the shelf load instead of plain screws in drywall. A bare screw in drywall alone will pull out under books or dishes. Check the anchor packaging for its weight rating, drill the hole size it asks for, and fit the anchor fully before you drive the screw.
Choose a First Drill Without Overspending
Once you know how to use a power drill, choosing one gets simpler. Beginner friendly drills usually sit in the 12 volt or 20 volt range, a point the Engineer Fix beginner guide makes clearly. A 12 volt drill is lighter, easier to hold overhead, and plenty for pilot holes, shelf brackets, and furniture assembly.
A 20 volt drill gives more twisting force for larger screws and dense wood, but it weighs more and can feel harder to control for a first time user.
For most first time buyers, a 12 volt or compact 20 volt drill driver kit with two batteries, a charger, and a basic bit set covers the first year of home jobs. Buying into one brand platform matters, because batteries from one brand do not fit another brand in most cases. Pick a brand you can find locally, so a spare battery or a replacement bit is easy to buy later.
Check three things in the store before you buy: the grip feels comfortable in your hand, the chuck opens and closes smoothly, and the weight feels manageable with one arm raised. A drill that tires your arm in a minute will make every job harder, whatever its voltage rating says on the box.
You do not need the most powerful model to learn well. A lighter drill you enjoy using beats a heavy drill that stays in the box. Add bigger tools only when a real job asks for them, such as a hammer drill for regular masonry work or an impact driver for deck screws.
Common Beginner Mistakes and How to Fix Them
Every beginner learning how to use a power drill makes the same few mistakes, and every one of them has a simple fix. The table below covers the ones that cause the most frustration, so you can recognise them fast and correct them without damage.
| Mistake | Why it happens | Fix |
|---|---|---|
| Bit wanders across the surface | Starting at full speed with no dent to guide the tip | Dent the mark first and start slowly until the bit bites |
| Screw head strips | Wrong driver bit size or clutch set too high | Match the bit exactly and test the clutch on scrap first |
| Wood splits near the end | No pilot hole, or a pilot hole that is too small | Drill a pilot hole slightly thinner than the screw shank |
| Screw sinks past flush | Clutch set too high for soft material | Lower the clutch by two numbers and test again |
| Hole goes in crooked | Drill held at an angle instead of straight | Line your arm up behind the drill and check from two angles |
| Bit overheats or smokes | Too much pressure and too much speed for the material | Ease off, let the bit cut, and clear dust from the hole |
One more habit saves many projects: practice the exact job on scrap first. A test hole and a test screw tell you the clutch setting, the bit size, and the feel of the material before the real workpiece is at risk. Scrap practice is not wasted time when you learn how to use a power drill.
It is the cheapest insurance in any DIY job.
Care, Batteries, and Storage
A drill lasts for years when you treat the battery well, and battery care is an easy part of learning how to use a power drill and store the tool clean. Wipe dust off the vents and the chuck after each job, because packed dust traps heat and shortens motor life. Add battery and bit checks to your home maintenance checklist so the drill is ready when you need it.
Keep bits in a case sorted by size, so you never force the wrong bit into a job because the right one was lost.
Charge batteries at room temperature and avoid leaving a flat battery sitting for months. Lithium batteries hold charge well in storage, but a battery left fully flat for a long time may refuse to charge again, so if you drill rarely, top the battery up every few months and store the drill with the lock switch engaged so the trigger cannot catch in a drawer or a toolbox. Remove the battery before changing bits, cleaning the chuck, or putting the drill away, and never leave a battery on a charger overnight in a hot garage, because a drill with no battery cannot start by accident, which is a small part of learning how to use a power drill safely.
Speed settings give a useful sense of what your drill can do. Engineer Fix reports that low speed on many drills runs around 0 to 400 revolutions per minute, which suits driving screws with maximum control, while high speed runs around 0 to 1500 revolutions per minute or more, which suits clean drilling. Your own model may differ, so check its manual for its exact range, and use those numbers as a guide rather than a rule.
When to Stop and Call a Pro
Knowing when to stop is part of learning how to use a power drill safely. A drill is a wonderful tool for shelves, furniture, brackets, and small repairs. It is not the right tool for every job in a home, and forcing it into the wrong job creates risk.
Bring in a licensed pro for gas lines, main electrical panel work, structural changes, and major plumbing inside walls. Call a pro too when you suspect wires or pipes behind a wall and you cannot confirm a safe spot, when a wall feels soft or damp, or when a repair has already failed twice. A quick pro visit costs less than water damage, a failed inspection, or an injury.
Use the same judgement for the drill itself. If the drill smells of burning, the battery feels very hot, the chuck wobbles, or the trigger sticks, stop and let the tool cool down. Check the manual, and have the tool serviced if the problem repeats.
A tool that acts strangely is telling you something, and ignoring it risks the tool and the job.
Safety note: power drills spin fast and throw debris, and they can twist sharply if a bit binds in the material. Hold the drill firmly with both hands where you can, keep your body balanced, and never reach across a spinning bit. If a bit binds, let go of the trigger at once, set the switch to reverse, and back the bit out slowly instead of forcing it free.
Sources for this how to use a power drill guide: EngineerFix drill clutch and torque settings guide, clutch 4 to 8 for soft materials, 12 to 18 for hardwoods and metal; Pickstead, DeWalt DCD771C2 review, price checked 5 November 2026; Home Depot listing via this site, late October 2026. All three sources are named in the guide, and the EngineerFix link opens the publisher guide directly.
Related guides
- DIY Basics for Homeowners: Essential Skills to Learn in 2027
- The Ultimate Home Maintenance Checklist for 2027
- Power Drill Safety Tips Every DIYer Should Know for 2027
- How to Choose a Power Drill for Home Projects in 2027
- Circular Saw Safety Tips Every DIYer Should Know for 2027
- What Is Never to Be Engaged When Using Power Tools in 2027
Frequently Asked Questions
What is the best way for a beginner to learn how to use a power drill?
Practice on scrap wood first, learn the chuck, clutch, speed switch, and forward and reverse controls, then drill a pilot hole and drive a test screw before any real job. Start slowly, keep the drill straight, and test the clutch setting on scrap until screws sit flush.
Should a beginner buy a corded or a cordless drill?
Most beginners should buy a cordless drill driver, because it works anywhere without a cord in the way and handles shelves, furniture, and brackets easily. Choose a corded drill only when you plan long, heavy sessions where a battery would keep running flat.
What clutch setting should I use for screws?
Start low and test on scrap wood, because the right number depends on the screw size and the material. Engineer Fix suggests around 4 to 8 for soft materials such as pine and drywall, and around 12 to 18 for hardwoods and metal, with the drill symbol reserved for drilling holes.
Do I really need a pilot hole for every screw?
A pilot hole is not needed for every screw in soft wood, but it is wise near board ends, in hardwood, and for larger screws, because it stops splitting and keeps the screw straight. Drill the pilot hole slightly thinner than the screw shank so the threads still grip firmly.
Why does my drill bit keep slipping out of the screw head?
The driver bit probably does not match the screw head, or you are not pressing firmly enough to keep it seated. Check the bit size, keep straight pressure on the back of the drill, use low speed for driving, and replace worn bits that no longer seat snugly.
Can I drill into brick or concrete with a normal drill?
You can drill small holes in brick and block with a masonry bit, but concrete and heavy masonry work far better with a hammer drill setting or a dedicated rotary hammer. Keep the drill straight, clear dust often, and stop if the bit binds instead of cutting.