How to Flush Tankless Water Heater Units in 2027
Turn off the gas and power, close the hot and cold isolation valves, and hook a pump and two hoses to the service ports. Run 4 gallons of white vinegar through the heat exchanger for 45 minutes, then rinse with clean water for 5 minutes. That is how to flush tankless water heater units the way manuals describe it.
Picture a shower in Las Vegas on a July morning. The water starts hot, then fades to lukewarm before the shampoo is out of your hair, and the unit on the garage wall flashes a code you have never seen. The tap water there runs about 16 grains per gallon of hardness, and that mineral load is exactly what coats the inside of a tankless heater.
A plumber will fix it for $150 to $300, and the visit takes about an hour. A jug of vinegar costs about $12, and the same hour in your own garage does the same work. I would try the vinegar first, because the job is mostly waiting while a pump hums in a bucket.
Your tankless heater has no tank, so what are you flushing
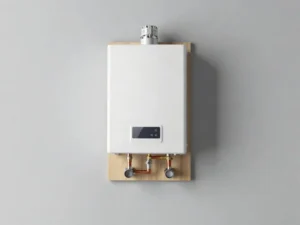
A tankless heater is a wall mounted box, and inside it sits a coil of narrow tubing, the heat exchanger. Cold water runs through that coil and a gas burner or an electric element heats it on the way to your tap. No tank means no drain plug and no pile of sediment at the bottom, so the job looks nothing like flushing a tank heater.
Hard water still leaves a mark. Calcium and magnesium settle out of hot water and harden into a crust inside the coil, and that crust narrows the tubes and blocks heat from reaching the water.
Flow drops, the water runs cooler, and the unit works harder for every gallon. Our guide to how a water heater works explains the tank version of this story, and the difference here is that the scale hides inside a coil you cannot see.
There is no tank to empty here, so the flush is really a descale, and a search for how to descale a tankless water heater turns up the same pump and vinegar loop. You send a mild acid around the coil in a loop until the crust softens and washes away, then run clean water through to finish. That is the whole job, and it is the reason learning to flush tankless water heater heat exchangers matters more than any other maintenance on these units.
Signs your tankless heater is asking for a flush
Scale builds quietly, so the first signs show up in the shower, not on the unit. The water takes longer to get hot, it fades to lukewarm halfway through, or the flow at the tap feels weaker than it used to. Any one of these on its own can have another cause, but two together point straight at the heat exchanger, and that is when most owners start looking up how to clean tankless water heater scale.
Error codes are the next clue. Most units flash a code on the display when flow or temperature drifts out of range, and a scaled coil is one of the common triggers. The manual lists what each code means, so read it before you assume the worst.
Noise and bills tell the same story from another angle. A scaled coil can rumble or whistle as water forces its way through narrowed tubes, and the burner runs longer to push heat through the crust, which shows up on the gas or electric bill. If your showers have gone lukewarm and the unit sounds different, it is time to learn to flush tankless water heater systems before the problem grows.
How often should you flush a tankless water heater
Most makers ask for a flush once a year, and Navien goes further with a schedule in its NPE 2 installation manual that ties the timing to how hard your water is. Soft water under 4 grains per gallon needs no flushing at all, while water at 4 to 9 grains needs it once a year. That is the baseline, and your own tap water decides whether you stick to it or flush more often.
| Water hardness | Flush schedule |
|---|---|
| Under 4 grains per gallon, soft | No flush needed |
| 4 to 9 grains per gallon | Once a year |
| 10 to 12 grains per gallon | Every 6 months |
| Over 12 grains per gallon | Every 6 months, consider a softener |
The numbers behind the table come from real places. Las Vegas tap water runs about 16 grains per gallon, and plumbers there see untreated units fail around year 5 instead of lasting the expected 15 to 20 years.
North Texas water runs 8 to 12 grains, and a unit flushed every 6 months there commonly runs 18 to 22 years, while one that is never flushed commonly fails in year 6 to 8. Houston water averaged about 8 grains per gallon in the city 2025 water quality report, and most Houston homes do fine with one flush a year.
If you do not know your hardness, your water provider publishes it, or a cheap test strip from a hardware store reads it in a minute. The schedule above is the simple version of how to flush tankless water heater units on time, and it beats guessing.
A real example from hard water country
Take a family in Las Vegas with a 3 year old unit and 16 grain water. The showers started fading to lukewarm in year 3, and a flush brought the heat back the same afternoon. The pro visit cost $150 to $300, and the family now flushes every 6 months, which is far cheaper than the $2,500 to $5,000 replacement a failed heat exchanger can demand.
What you need before you start
The kit is small, and most of it is already in a garage. A 5 gallon bucket holds the vinegar, a 1/6 HP submersible pump pushes it through the coil, and two short hoses with garden hose ends connect the pump to the service ports. Add 4 gallons of plain white vinegar, a towel, work gloves, and a bucket to catch drips.
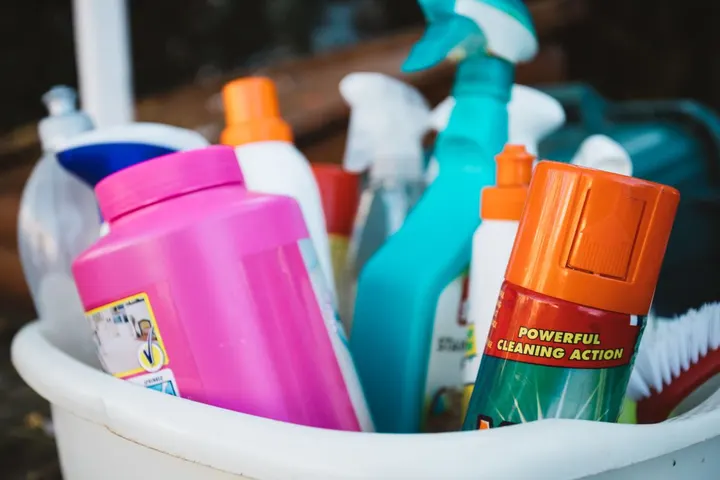
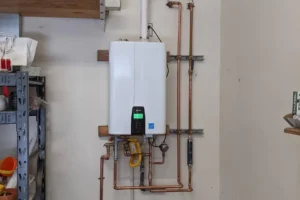
You also need to find two things on your own unit before you buy anything. The first is the service valves, also called isolation valves, a pair of valves on the hot and cold lines under the unit, each with a small capped port. The second is your manual, and the manual is the final word, because every brand sets its own flush time and its own approved descaler.
If yours is a condensing unit, the manual may also list a condensate trap or a neutralizer to check while you are in there.
If your unit has no service valves, this is where the DIY job ends. Fitting the valves means cutting into the water lines, so book a plumber for that part and the flush becomes a simple job after.
You need only a few things to learn to flush tankless water heater systems at home, and a flush kit bundles the pump, hoses, and bucket for $30 to $60 if you would rather buy one box than gather parts.
White vinegar or a descaling solution
White vinegar is the default choice, and it is what most manuals call for. It is about 5 percent acetic acid, it costs a few dollars a gallon, and it dissolves the calcium carbonate scale that hard water leaves behind. For a unit flushed on schedule, vinegar is plenty, and it is the liquid in almost every guide on how to clean a tankless water heater.
A commercial descaler is the stronger option for a unit that has gone years without a flush. These solutions are made for tankless heat exchangers, and they dissolve heavy scale faster than vinegar, but they cost more and some are toxic, so read the label and never mix cleaners. Your manual may name a specific product, and if it does, use that one.
Vinegar is the cheap choice for routine care, and it is the liquid most guides use to flush tankless water heater units, while a descaler is the right call when the scale has had years to bake on.
Stick to what your manual names. Drain cleaner, bleach, and muriatic acid can eat through the coil, the seals, and the valves, and that damage costs far more than a jug of vinegar.
Flush tankless water heater units, step by step
These steps cover units that already have service valves fitted, and they use the pattern most manuals share to flush tankless water heater systems. Your own manual is the final word here, because valve names and flush times change from one brand to the next.
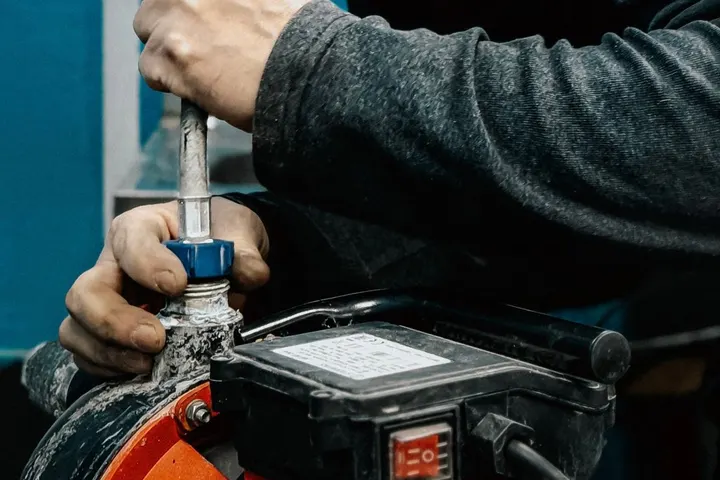
- Kill the fuel and the power first. Shut the gas valve on the line into the unit, then unplug it or flip its breaker off. An electric unit needs its breaker or breakers off too.
- Let the unit cool for at least 30 minutes. The coil holds hot water, and opening a port too soon sprays it.
- Shut both isolation valves. Turn the handles on the hot and cold service valves until water stops moving in and out of the heater. Taps elsewhere in the house still work.
- Open the service port caps a little at a time, with a towel underneath to catch drips. A small splash of leftover water is normal.
- Build the loop. Drop the submersible pump into the 5 gallon bucket, pour in 4 gallons of white vinegar, and run one hose from the pump outlet to the cold service port. Run the second hose from the hot service port back into the bucket, so the vinegar circles through the coil and returns.
- Open both purge valves and switch the pump on. Vinegar enters through the cold side, passes through the heat exchanger, and comes back out the hot side into the bucket. This loop does the real work to flush tankless water heater heat exchangers, so let it run.
- Keep it circulating for at least 45 minutes. Navien sets 45 minutes as the floor, and Angi splits the vinegar into two 30 minute sessions for a full hour on a neglected unit. Give it the full 60 minutes if the unit has gone more than a year without a flush.
- Rinse with clean water. Shut the cold side purge valve, point the drain hose at a floor drain or a laundry tub, and open the cold supply valve so fresh water runs through the unit for at least 5 minutes. That rinse carries the last of the vinegar and loose scale out of the coil.
- Close everything up. Shut the purge valves, remove the hoses, refit the port caps, and open both isolation valves. Wipe up drips and check every connection for leaks.
- Restore power and gas, then test. Turn the gas back on, plug the unit in or switch the breaker on, and run a hot tap. The water should heat fast and hold its temperature, and the display should show no error code.
That is the full loop, and it takes about 90 minutes from setup to cleanup, most of it waiting. If the flow still feels weak after a full flush and rinse, the scale may need a second pass with a commercial descaler, or a plumber with stronger equipment.
How long does the whole job take
| Stage | Time |
|---|---|
| Setup and shutdown | 15 minutes |
| Vinegar circulation | 45 to 60 minutes |
| Fresh water rinse | 5 minutes |
| Restart and leak check | 10 minutes |
| Total | About 90 minutes |
Angi lists the job at 90 minutes from start to finish, and most of that hour is the pump running while you do something else. The circulation itself runs 45 minutes at minimum, and a unit that has been ignored for over a year earns the full hour. Most of the time is waiting while the pump runs, which is why learning to flush tankless water heater units fits a quiet Saturday morning.
What a plumber charges to flush a tankless water heater
| Option | Cost |
|---|---|
| DIY, vinegar only, pump already owned | About $12 |
| DIY, full flush kit with pump and hoses | $30 to $60 |
| Pro flush, national range | $150 to $300 |
| Pro flush, higher range | $150 to $350 |
| Pro flush with full service, Houston example | $195 flat |
HomeGuide puts a professional flush at $150 to $350, and the Plumbing Price Guide lists $150 to $300 with most jobs taking about an hour. Angi lists plumber labor at $45 to $150 per hour, and a full flush kit costs $100 to $200 if you buy the pump and hoses new. A Houston company charges $195 flat for an annual flush with a 12 point service, which shows what the top of the range buys.
The math that matters is the repair the flush prevents. A heat exchanger replacement runs $1,200 to $2,800 in Houston, and a full unit replacement in Las Vegas runs $2,500 to $5,000 or more. The plumber does the same pump and vinegar loop this guide walks through, so knowing how to flush tankless water heater units yourself saves you that bill every year.
Mistakes that leave the scale right where it was
Rushing the circulation is the most common mistake. Vinegar needs time against the scale, and a 10 minute run barely touches a year of buildup. Give it the full 45 minutes, and give it an hour if the unit has been ignored.
Running the pump dry is the expensive one. A submersible pump burns out fast when it sucks air, so keep it covered with vinegar the whole time and top up the bucket if the level drops. Skipping the rinse is the mistake that leaves vinegar in the lines, and it undoes the good work of learning to flush tankless water heater systems properly.
Two more mistakes are easy to avoid. The first is flushing with the gas or power still on, which can fire the burner with no water moving through the coil. The second is using a cleaner your manual does not approve, which can eat seals and void the warranty.
Check the manual, close the valves, and let the pump do its work. Those three habits cover most of what it takes to flush tankless water heater units well.
When to hand the job to a plumber
Some jobs belong to a pro, and the flush has a short list of them. If your unit has no isolation valves, you cannot follow the standard steps to flush tankless water heater units, and adding the valves is the plumber job that makes every future flush easy.
Call a plumber if the error code stays on after a full flush, if the water still runs lukewarm, or if you smell gas at any point. A gas smell means stop, ventilate the room, and call the gas company or a plumber from outside the house. A unit that has gone 5 years or more without a flush may also need a commercial descaler and a pro pump, because household vinegar cannot always cut through scale that old.
Warranty is the last reason to call. King Heating points out that most makers want proof of a yearly flush on file, and a dated invoice from a pro is the simplest proof. Keep a note of every flush you do yourself too, with the date and the vinegar you used, because a paper trail is what a warranty claim asks for.
A gas tank heater follows a different routine, and our guide to draining a gas water heater walks through the pilot and burner steps that do not apply to a tankless unit.
Stay safe while you work
Water inside a tankless unit can scald, and gas and electricity both demand respect. Let the unit cool for 30 minutes before you open any port, wear gloves when you handle the pump and hoses, and never light a match or a lighter near a gas smell.
If anything feels wrong, stop and call a plumber, because a $200 visit is cheaper than a burned hand or a damaged heater. These are small habits, and they keep you safe when you flush tankless water heater units.
Related guides
These guides cover the tank side of the same story, and they fill in the parts this article only touches.
- How Does a Water Heater Work? Inside the Tank in 2027
- How to Flush a Water Heater in 2027
- How to Drain a Gas Water Heater in 2027
- How to Drain an Electric Water Heater in 2027
- How Long Does a Water Heater Last in 2027
- What Is a Tankless Water Heater in 2027
- How Does a Tankless Water Heater Work in 2027
Frequently Asked Questions
How often should you flush a tankless water heater?
Once a year for most homes, and every 6 months if your water is hard, above about 10 grains per gallon. Navien says soft water under 4 grains needs no flushing at all. Your water provider can tell you your hardness, or a test strip reads it in a minute.
Can I use regular white vinegar to flush a tankless water heater?
Yes. Plain white vinegar is what most manuals call for, and it is the liquid this guide uses for how to flush tankless water heater scale at home, so use 4 gallons and circulate it for at least 45 minutes. A commercial descaler works better on heavy scale that has baked on for years.
How long does it take to flush a tankless water heater?
About 90 minutes from setup to cleanup, with 45 to 60 minutes of that as circulation time while the pump runs. The rinse takes 5 minutes and the restart check takes about 10. Most of the job is waiting, not working.
What happens if you never flush a tankless water heater?
Scale narrows the heat exchanger until showers run lukewarm, flow drops, and the unit throws error codes. In very hard water, untreated units commonly fail around year 5 instead of lasting 15 to 20 years. A flush once a year prevents most of that damage.
Can I flush a tankless water heater without isolation valves?
Not with the standard pump loop, because there is no way to connect the hoses or keep the vinegar inside the unit. A plumber can add isolation valves for $200 to $300, and once they are in, every flush after that is a simple one hour job you can do yourself. Until then, book a pro flush.
Does flushing a tankless water heater keep the warranty valid?
Most manufacturers require a documented annual flush, so keeping the maintenance up to date protects the warranty rather than risking it. Keep a dated note of each flush, and keep pro invoices too. Check your manual, because the exact terms change by brand.
Sources: Navien NPE 2 installation manual, as summarized by Ductlesswise; Angi; King Heating; Plumbing Price Guide; HomeGuide; US Department of Energy; City of Houston 2025 water quality report; Apex Home Care; Active Plumbing.